
Reception and analytics with Smarter Visitor Registration
What visitors see at the terminal and how reception keeps track: check-in, check-out, analytics, export and the display for the screen in the lobby.
Who this page is for
This page is for everyone who works with the visitor registration day to day: reception, site security and hosts. It describes the interface as visitors and employees see it. The setup is described under Configuration.
The terminal
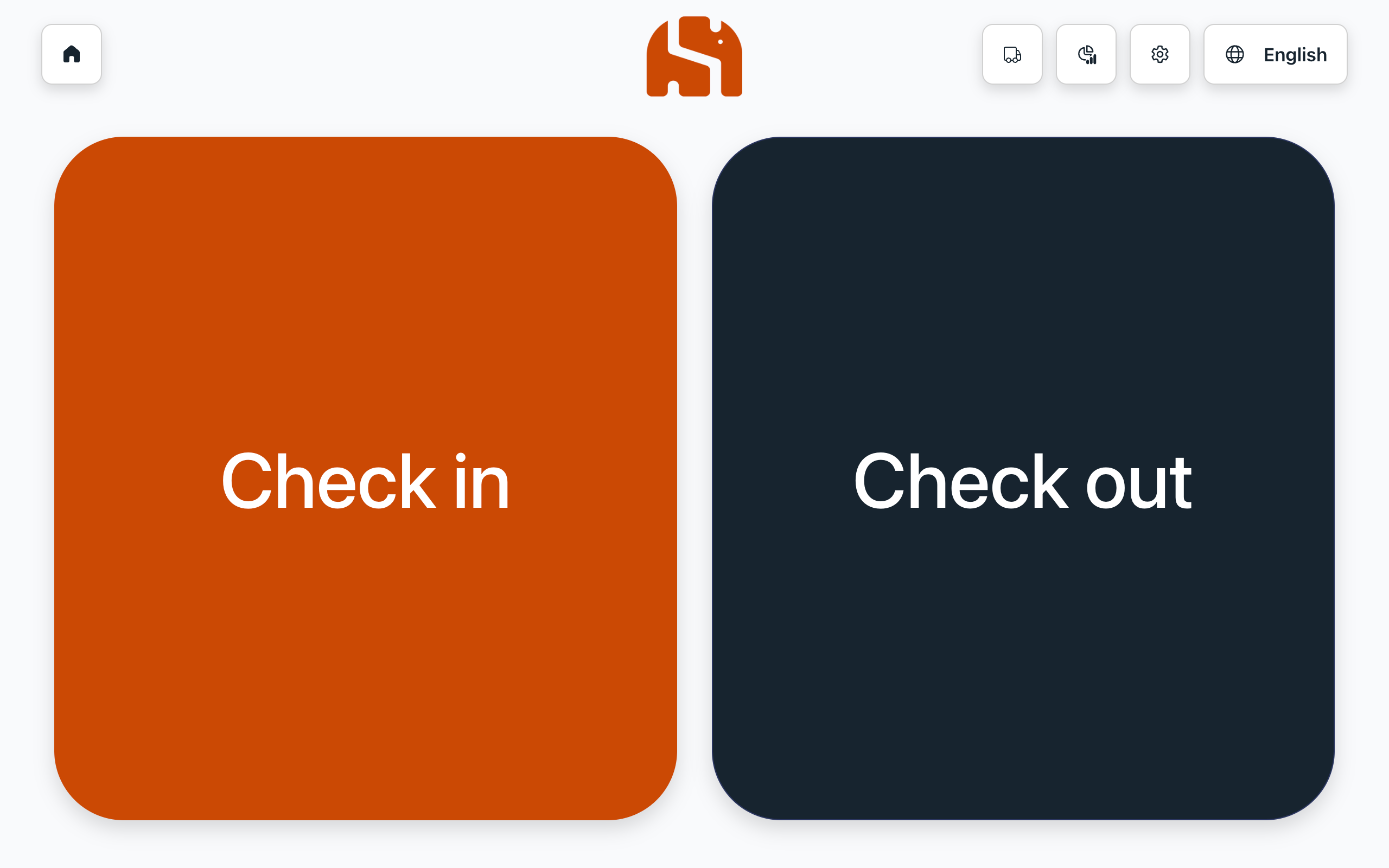
- Check in and Check out start the two processes.
- With the language selection, visitors switch between German and English.
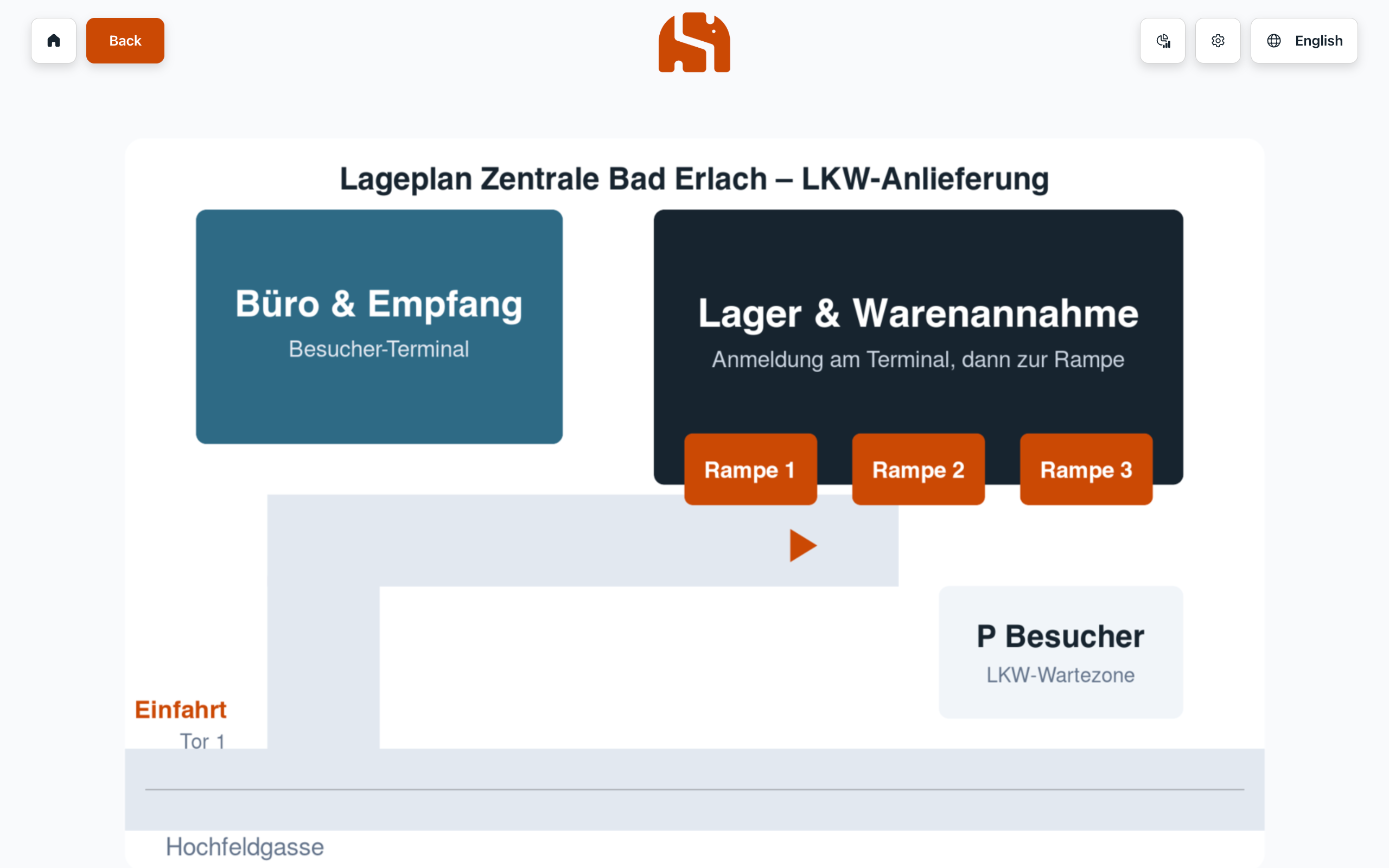
- The truck button shows the site plan of the location if one has been uploaded.
- The home icon leads back to the start from every page. If a process is left unfinished, the terminal returns by itself after a short time.
- Administrators and people with access to the analytics also see the icons for analytics and settings. They do not appear for the kiosk account.
Check-in with QR code
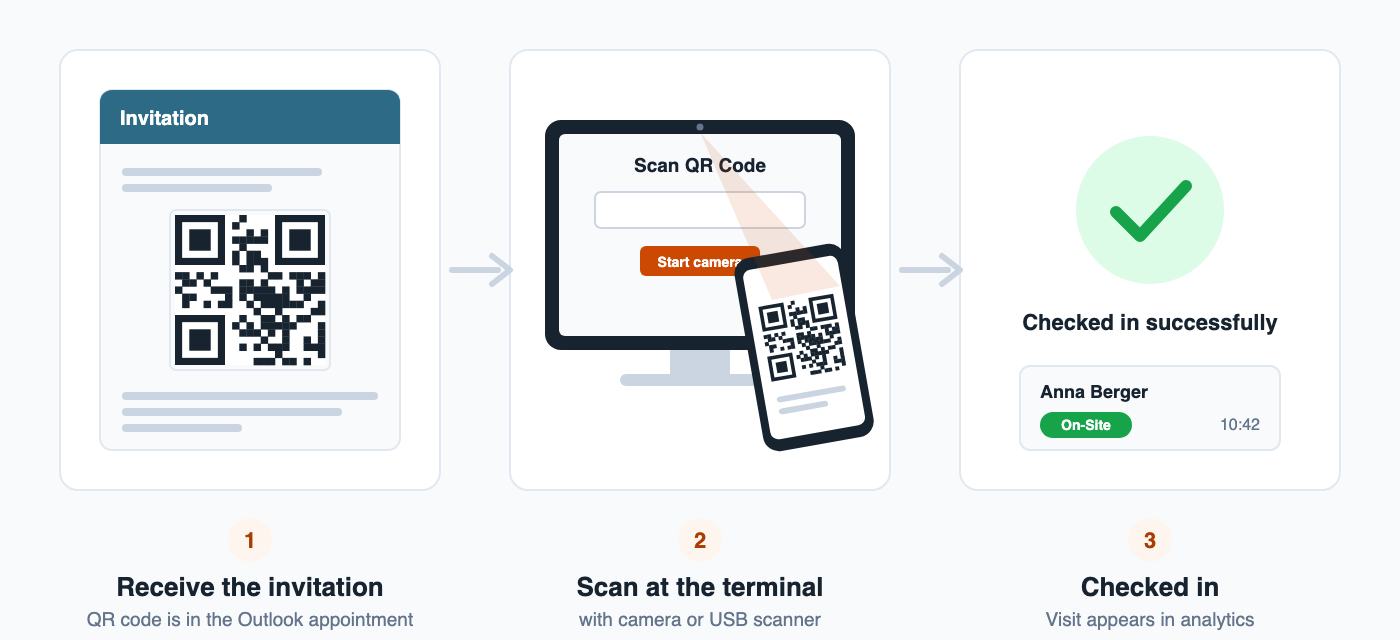
- The visitor taps Check in and then Scan QR Code.
- They hold the QR code from the invitation, on their smartphone or printed out, in front of the camera or the scanner.
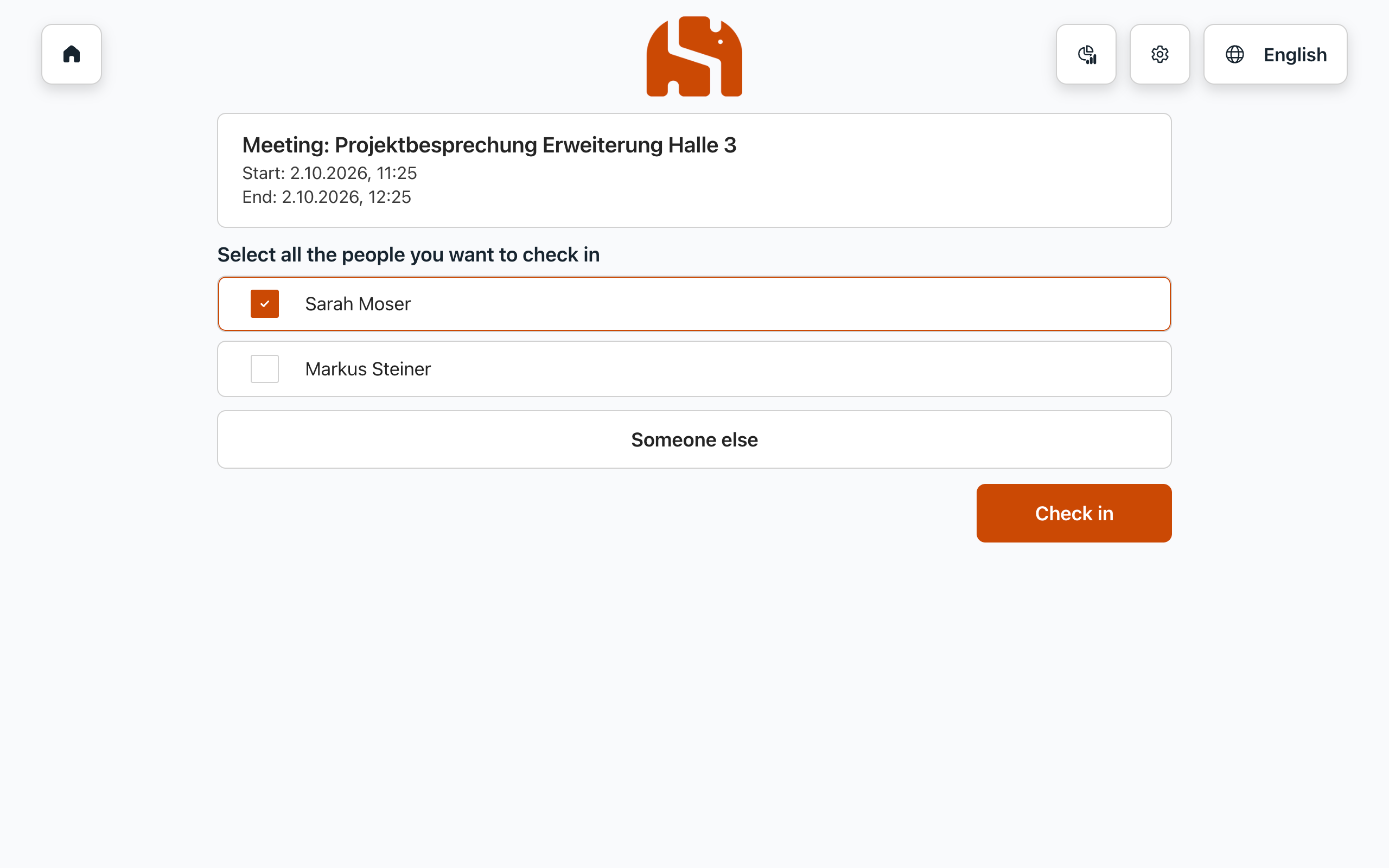
- If several people are invited to the appointment, they select who is checking in. With Someone else, a person who is not on the invitation checks in.
- They check and complete their contact data, confirm the behavior guidelines if applicable and tap Save.
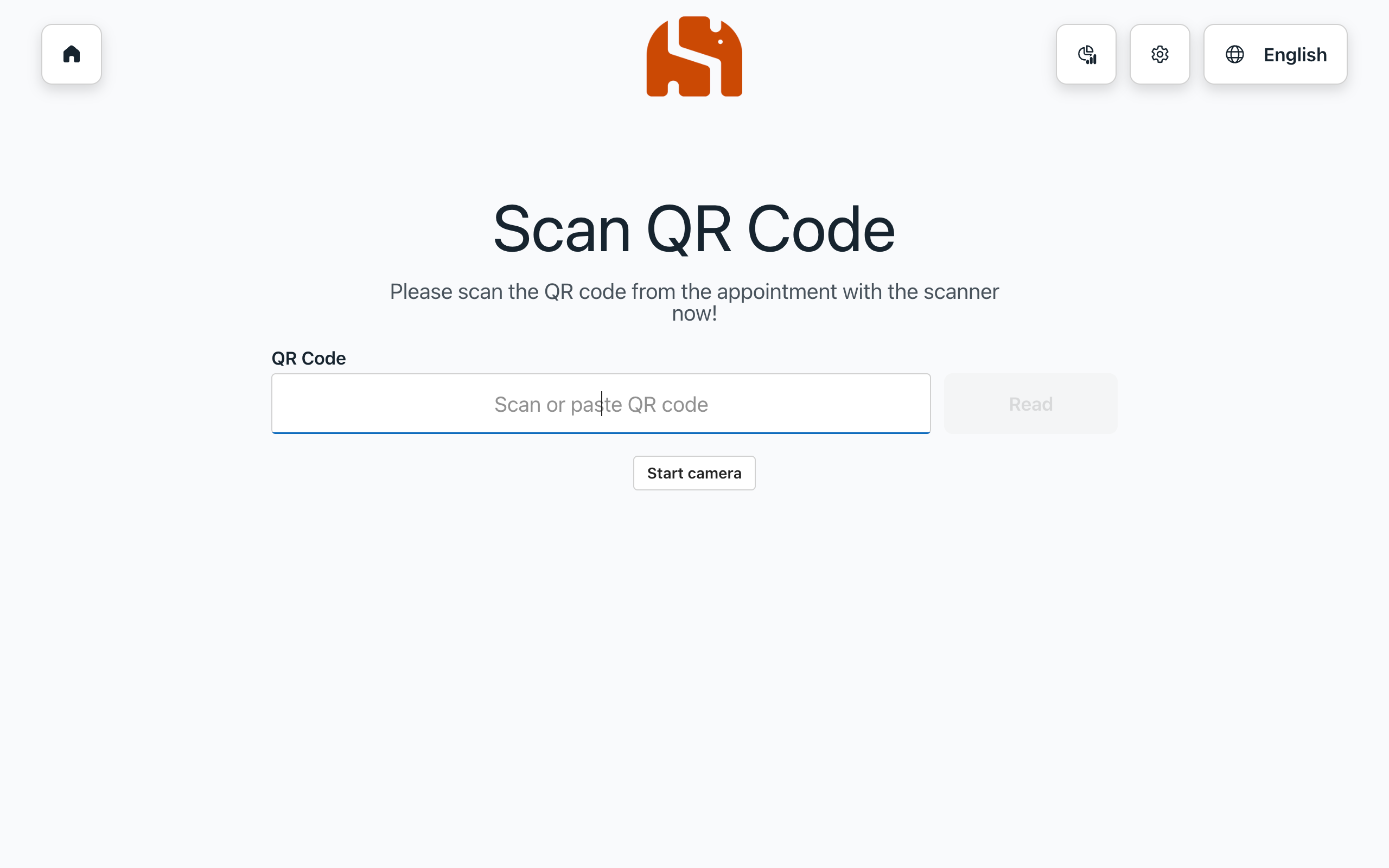
There are three ways to scan: a USB scanner works without a further click. With Start camera, the camera of the device scans. As a fallback, the code can also be pasted into the field and confirmed with Read.
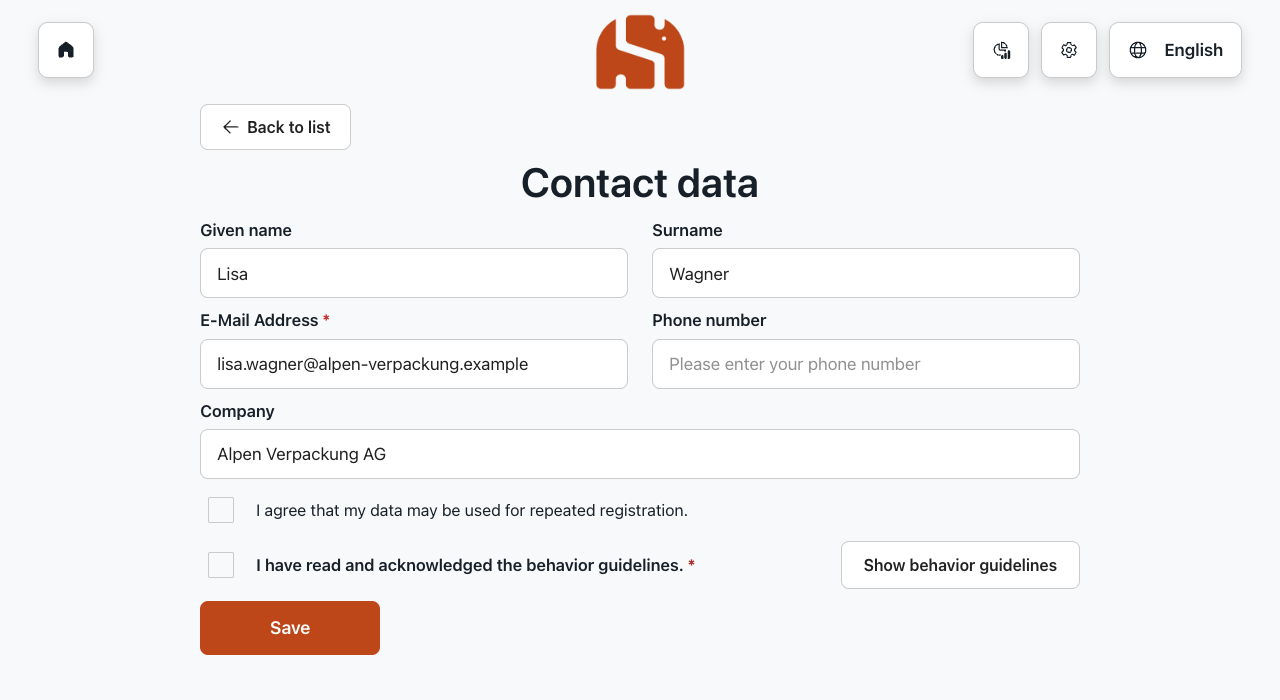
- Name and email address are pre-filled from the invitation. If the person has visited before and agreed to their data being stored, company and phone number are filled in as well.
- The checkbox “I agree that my data may be used for repeated registration” is optional.
- Each email address can only be checked in once at a time. Anyone who is still listed as on site checks out first.
Confirming the behavior guidelines
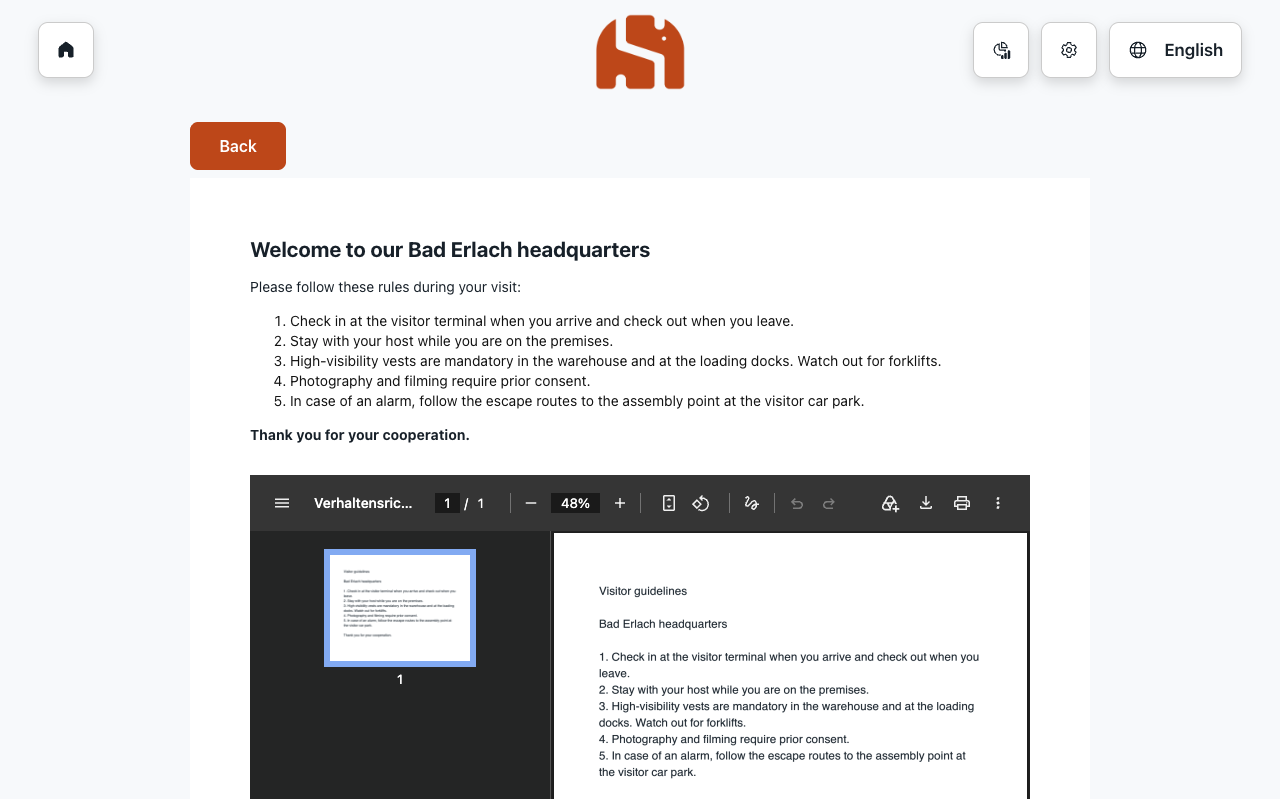
If behavior guidelines are set up for the location, the form shows a checkbox and the button Show behavior guidelines. If confirmation is set as required, check-in is only possible after the checkbox has been ticked.
Manual check-in without prior registration
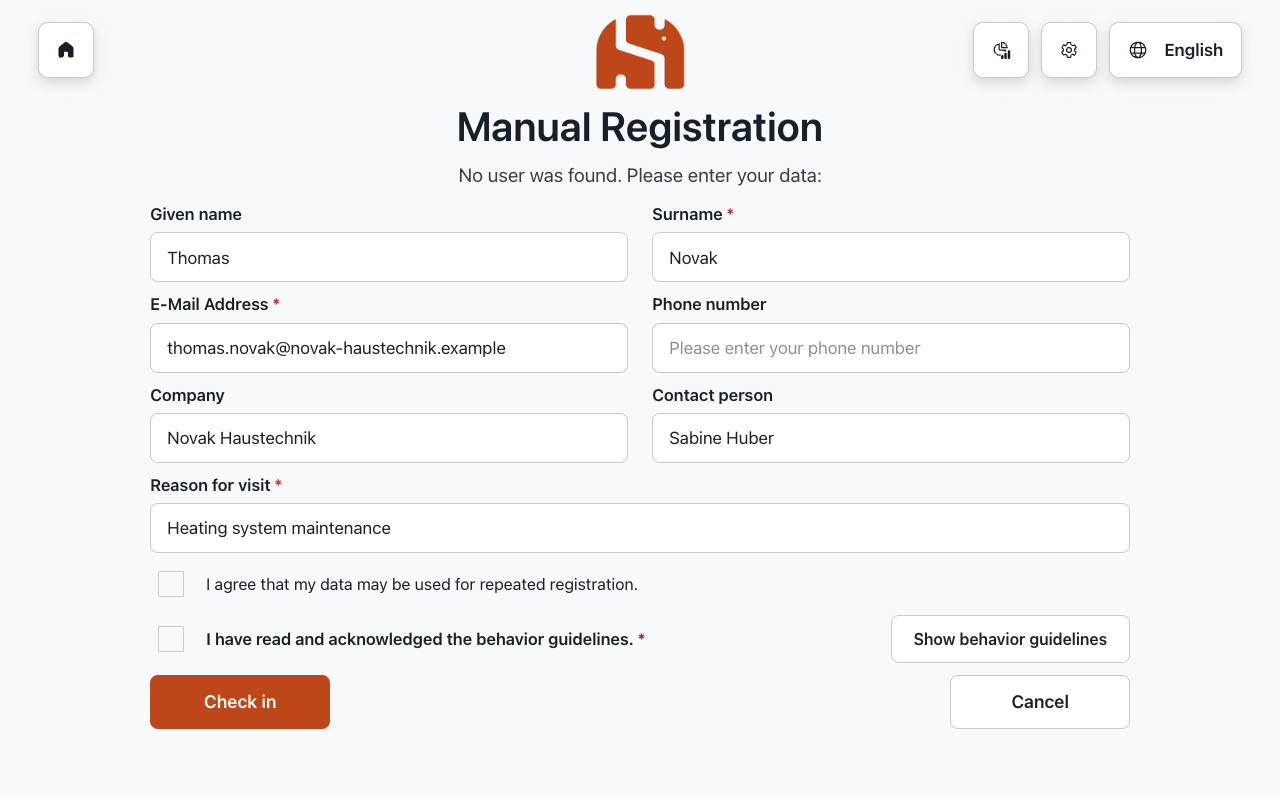
The manual check-in is intended for visitors without an invitation: suppliers, tradespeople, unannounced guests.
- Select Check in › Manual Check-In and enter the email address.
- If the person is known, their data is pre-filled. Otherwise they fill in the form: surname, email address and reason for visit are required.
- Under Contact person, depending on the setting of the location, they select a person from the directory or type the name.
- With Check in, the visit is recorded.
QR code for check-out
If enabled at the location, the visitor receives an email with a QR code after the manual check-in. They use it to check out quickly when leaving.
After check-in
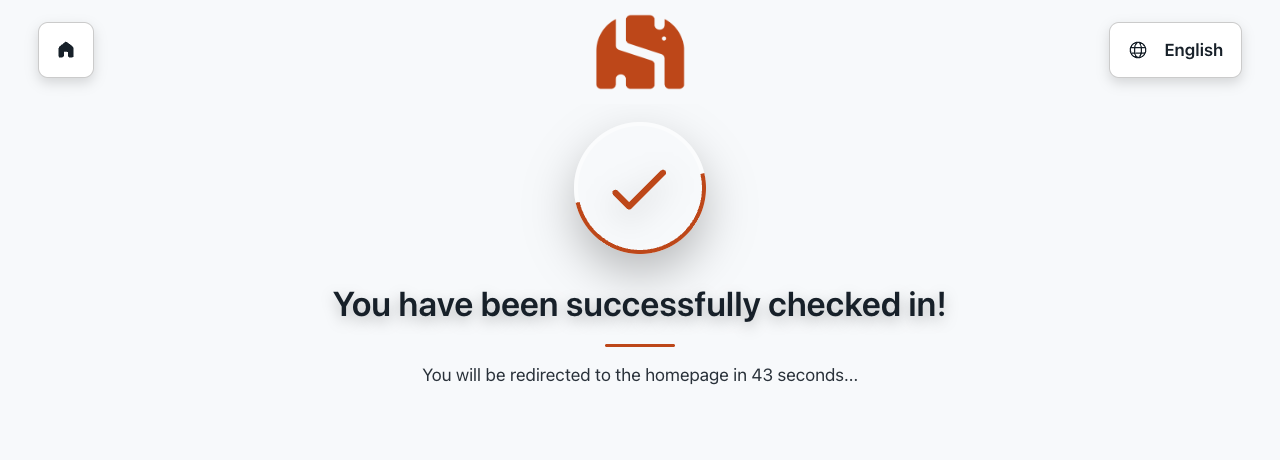
- If the terminal runs in Microsoft Teams and calls are enabled, the button “Call <Name>” or “Call central” appears. For details, see Teams and kiosk › Calls.
- If the check-in confirmation is enabled, the visitor receives an email, optionally with the behavior guidelines attached.
- In the analytics, the status changes from “Planned” to “On-Site”.
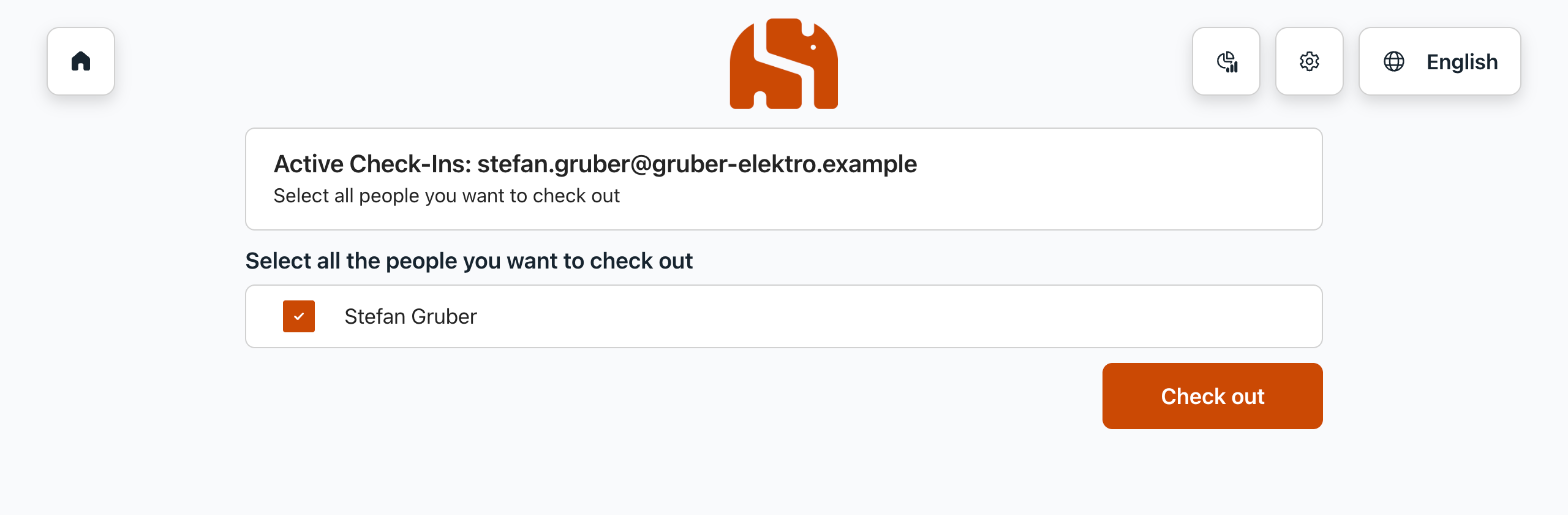
Check-out
- With QR code: Check out › Scan QR Code. Both the code from the invitation and the code from the email after the manual check-in work.
- With email address: Check out › Manual Check-Out, enter the email address and confirm the person.
- For an appointment with several people on site, the visitor selects who is checking out.
Forgotten check-outs
Anyone who forgets to check out is checked out automatically at midnight. Until then, you recognise such cases in the analytics by the tile “Forgotten (>24h)”.
Truck site plan
For deliveries, the truck button on the home screen shows the site plan of the location in full screen, with access road, ramps and waiting areas. Administrators upload the plan in the settings of the location.
Analytics
You open the analytics with the chart icon or at /analytics. They refresh every 30 seconds.
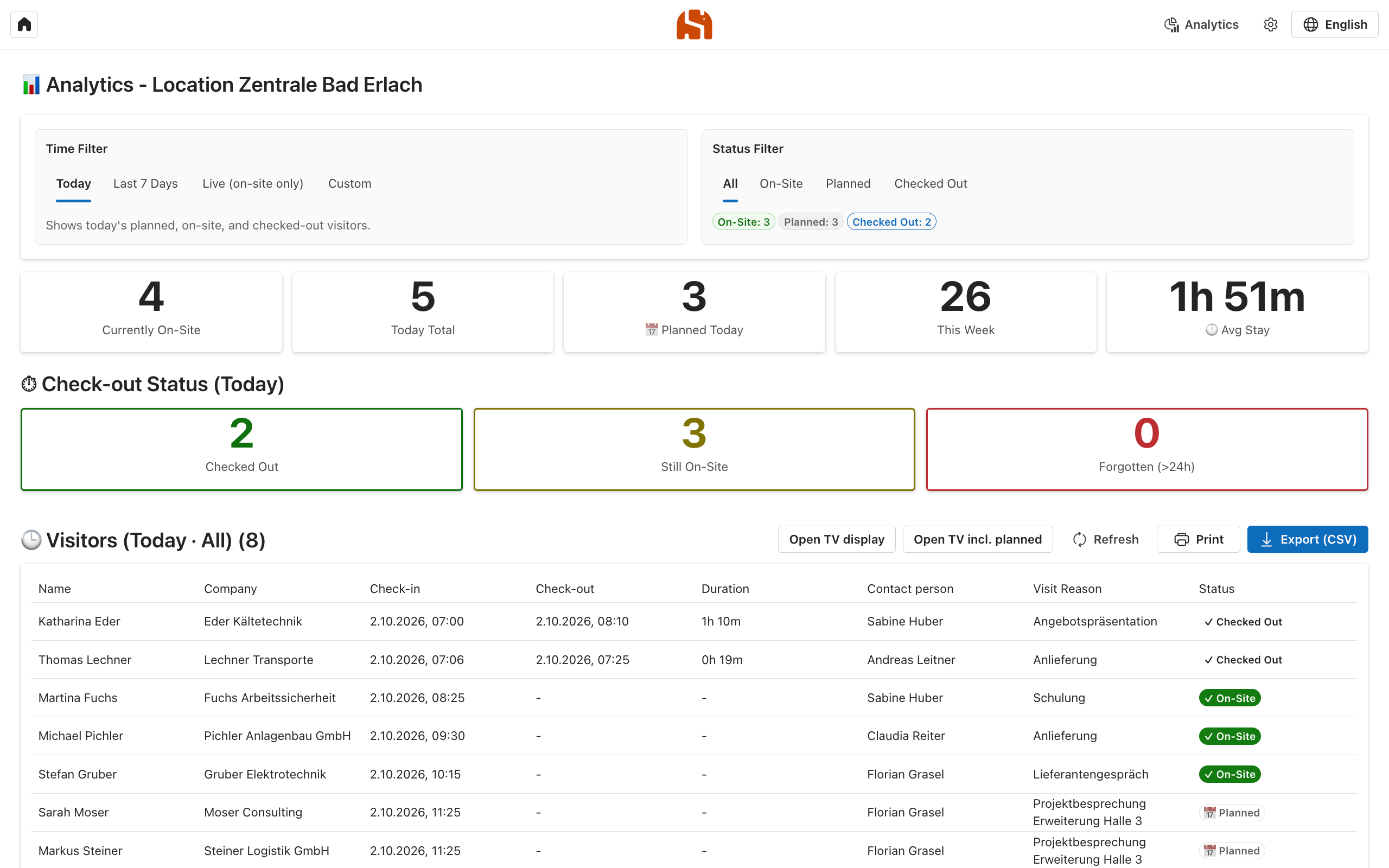
| Area | Content |
|---|---|
| Time filter | “Today”, “Last 7 Days”, “Live (on-site only)” and “Custom” with start and end date. |
| Status filter | “All”, “On-Site”, “Planned” and “Checked Out”, each with a count. |
| Key figures | Currently on site, today total, planned today, this week and the average length of stay. |
| Check-out Status | Checked out, still on site and forgotten check-outs (on site for longer than 24 hours). |
| Visitor list | Name, company, check-in, check-out, duration, contact person, visit reason and status. |
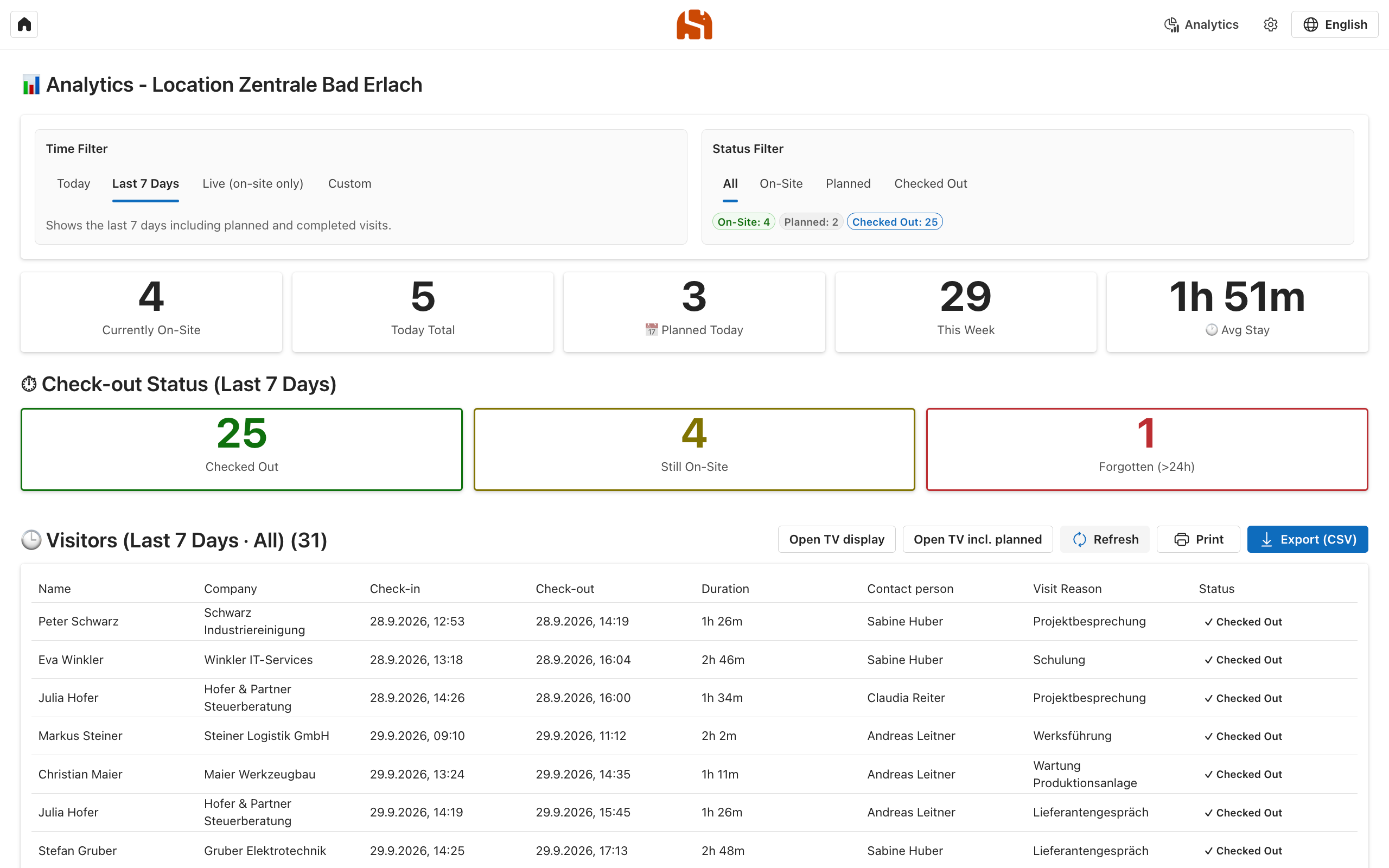
- Planned visitors come from Outlook appointments with a QR code. For them, the “Check-in” column shows the planned start.
- Changing the location: Anyone who may see several locations selects the location in the footer. The selection also applies to the TV display.
- Print outputs the filtered list with location and time, for example as an attendance list for an evacuation.
- Export (CSV) downloads the visits of the selected period, 90 days at most at a time. The columns are separated by commas.
TV display for reception
The TV display shows the visitors on site in large format and without controls. It is intended for a screen at reception or in the office. You open it from the analytics:
- Open TV display: only visitors who are currently on site.
- Open TV incl. planned: in addition, the visitors expected today.
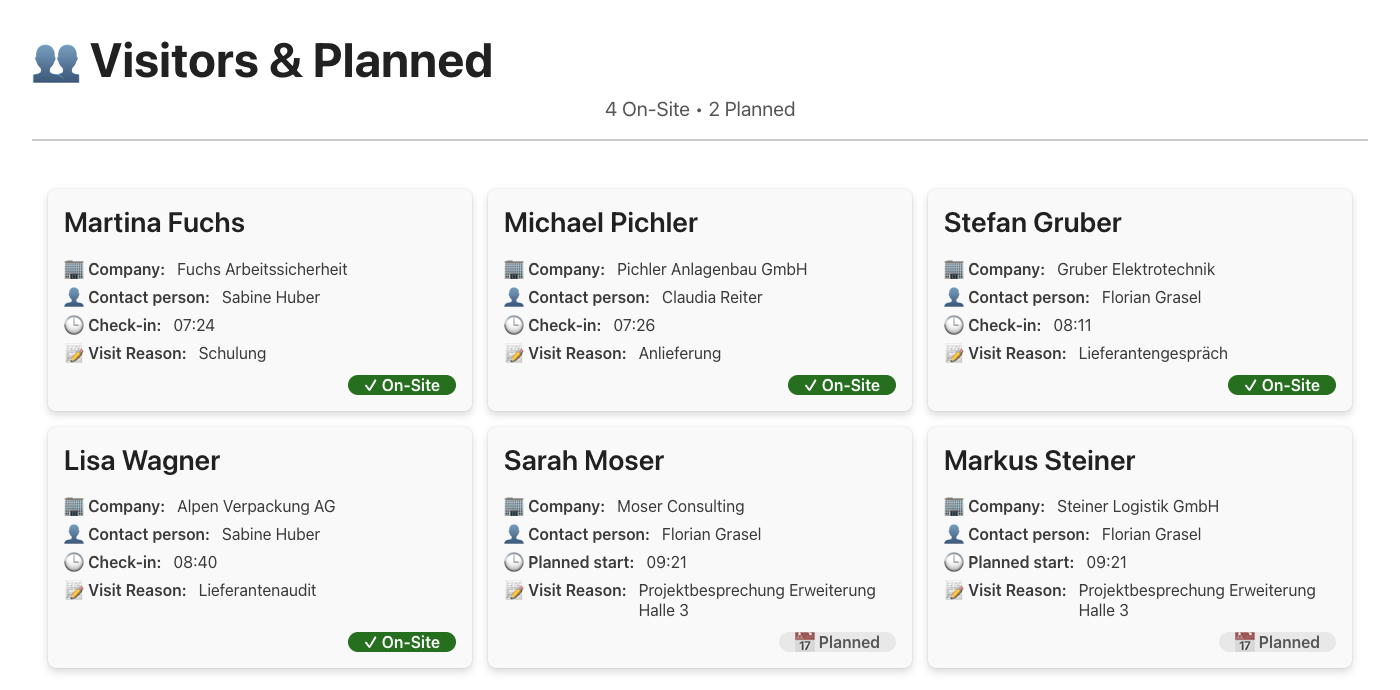
| Address | Effect |
|---|---|
/display/tv | Visitors on site, refresh every 30 seconds |
/display/tv?planned=1 | Visitors on site and visitors planned for today |
/display/tv?refresh=60 | Refresh every 60 seconds, possible values are 10 to 300 |
Sign-in and location
The display needs a signed-in account with access to the analytics. It shows the location that was last selected in this browser.
Frequently asked questions from daily use
A visitor does not have their QR code with them.
The terminal says “Visitor is already checked in”.
How do I check out someone who has already left?
Can I see who is in the building when it is being evacuated?
A guest is missing from the list of planned visitors.
Questions about this product?
Our support team is happy to help with any questions about Smarter Visitor Registration.