
Teams and kiosk for Smarter Visitor Registration
Running the terminal as an app in Microsoft Teams: generate the app package, upload it in the Teams admin center, pin it as the only app for the kiosk account and enable calls to contact persons.
Browser or Teams?
The terminal runs in any current browser. Microsoft Teams adds one function: after check-in, visitors can call their contact person or the central desk directly from the terminal. For this, the terminal is added to Teams as a personal app.
This page describes both options and shows how you set up Teams for a kiosk account so that only the visitor terminal is available there.
The two operating modes compared
| Browser kiosk | Teams kiosk | |
|---|---|---|
| Check-in and check-out | yes | yes |
| QR scan with camera or USB scanner | yes | yes, the camera can be restricted in Teams on the web |
| Call to contact person and central desk | no | yes |
| Emails to visitors | yes | yes |
| Setup | Open the address of the terminal in the browser | Upload the app, assign the policy |
Recommendation
If calls are not important, the browser kiosk is the simplest option. The Teams kiosk is worthwhile for receptions that are not staffed at all times.
Preparing the kiosk account
Each terminal signs in with its own user account, for example reception.vienna@yourcompany.com. Do not use a personal account for this.
| Requirement | Why |
|---|---|
| Exchange Online mailbox | Emails to visitors are sent from the mailbox of this account. |
| Microsoft Teams licence | Only for the Teams kiosk: for the app and for calls. |
| Teams Phone with a Calling Plan | Only if the central desk is a landline or mobile phone number. |
| No administrator rights | The account only needs access to the terminal. |
- Create the account in the Microsoft 365 admin center and assign the licences.
- Enter it in the settings of the location under Access › Terminal Users.
- Sign in once on the device with the account and open the terminal. If “Check in” and “Check out” appear, the permission is correct.
Staying signed in
The terminal renews its sign-in in the background. Conditional Access policies that require frequent re-authentication or MFA on the device interrupt kiosk operation. Exclude the kiosk account from them or tie the exception to the device.
Setting up the browser kiosk
- Sign in on the device with the kiosk account.
- Open
https://<name>.azurewebsites.net/terminaland allow access to the camera. - Set the browser to full screen. For a fixed kiosk, use the kiosk mode of your system, for example assigned access in Windows with Microsoft Edge or Guided Access on the iPad.
- Select the language in which the terminal should start. The selection is stored on the device.
The interface is designed for tablets in landscape format from 1024 × 768 pixels. Instead of the camera, you can connect a USB scanner that enters the code like a keyboard.
Generating the Teams app
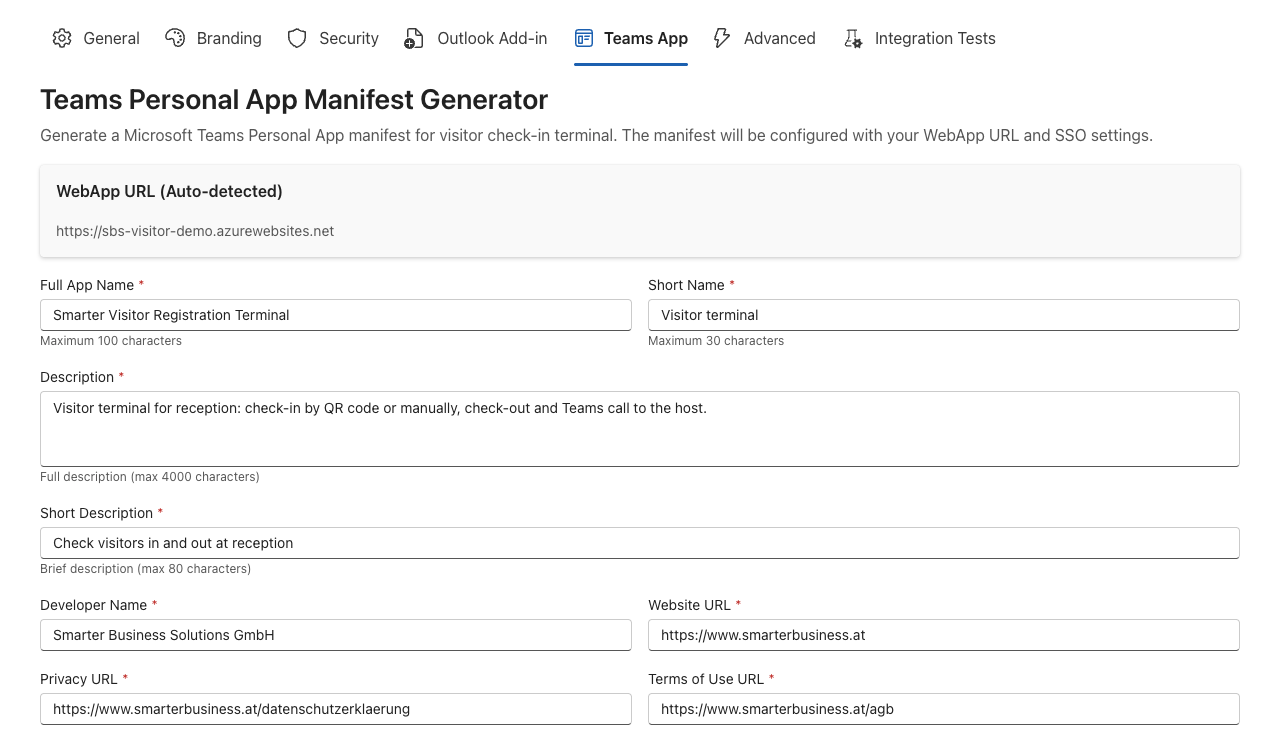
You generate the app package for Teams under Settings › Teams App. It contains a personal tab that opens the terminal, and the details for sign-in with single sign-on.
| Field | Meaning |
|---|---|
| Full App Name | Name of the app in app management, 100 characters at most. |
| Short Name | Label in the app bar of Teams, 30 characters at most. For example “Visitor Terminal”. |
| Description and Short Description | Texts for the app details in Teams. |
| Developer Name, Website URL, Privacy URL and Terms of Use URL | Required for every Teams app. Enter the pages of your company. |
| Client ID | The client ID of the app registration. Filled in automatically. |
| Accent Color | Background colour of the app icon, as a hex value. |
| Version | Version of the app. Increase it for every new package, otherwise Teams rejects the upload. |
| Enable Single Sign-On (SSO) | Signs the terminal in with the account that is signed in to Teams. Leave switched on. |
- Fill in the fields and click Generate & Publish Manifest.
- Download the package with Download manifest.zip. The file is called
teams-app-manifest.zip.
Uploading the app in the Teams admin center
- Open the Teams admin center and go to Teams apps › Manage apps.
- Select Actions › Upload new app and upload the ZIP file.
- Open the app in the list and go to the Users and groups tab.
- Select Edit availability and set Available to to Specific users or groups. Add the kiosk account or a group containing all kiosk accounts.
- Optional: in the same tab, select Install app and specify the same accounts. This is not required, because apps you pin through the setup policy in the next step are installed automatically for the assigned accounts.
If your tenant still uses permission policies
In older configurations, you control availability with Teams apps › Permission policies and the installation with “Installed apps” in the setup policy. The result is the same.
This requires that custom apps are allowed in your organisation (Manage apps › Actions › Org-wide app settings). After the upload, it can take a few hours until the app appears in Teams.
Pinning only the terminal: the setup policy
The app setup policy determines which apps are in the left-hand bar of Teams. For the kiosk account, you create a separate policy in which only the visitor terminal is pinned.
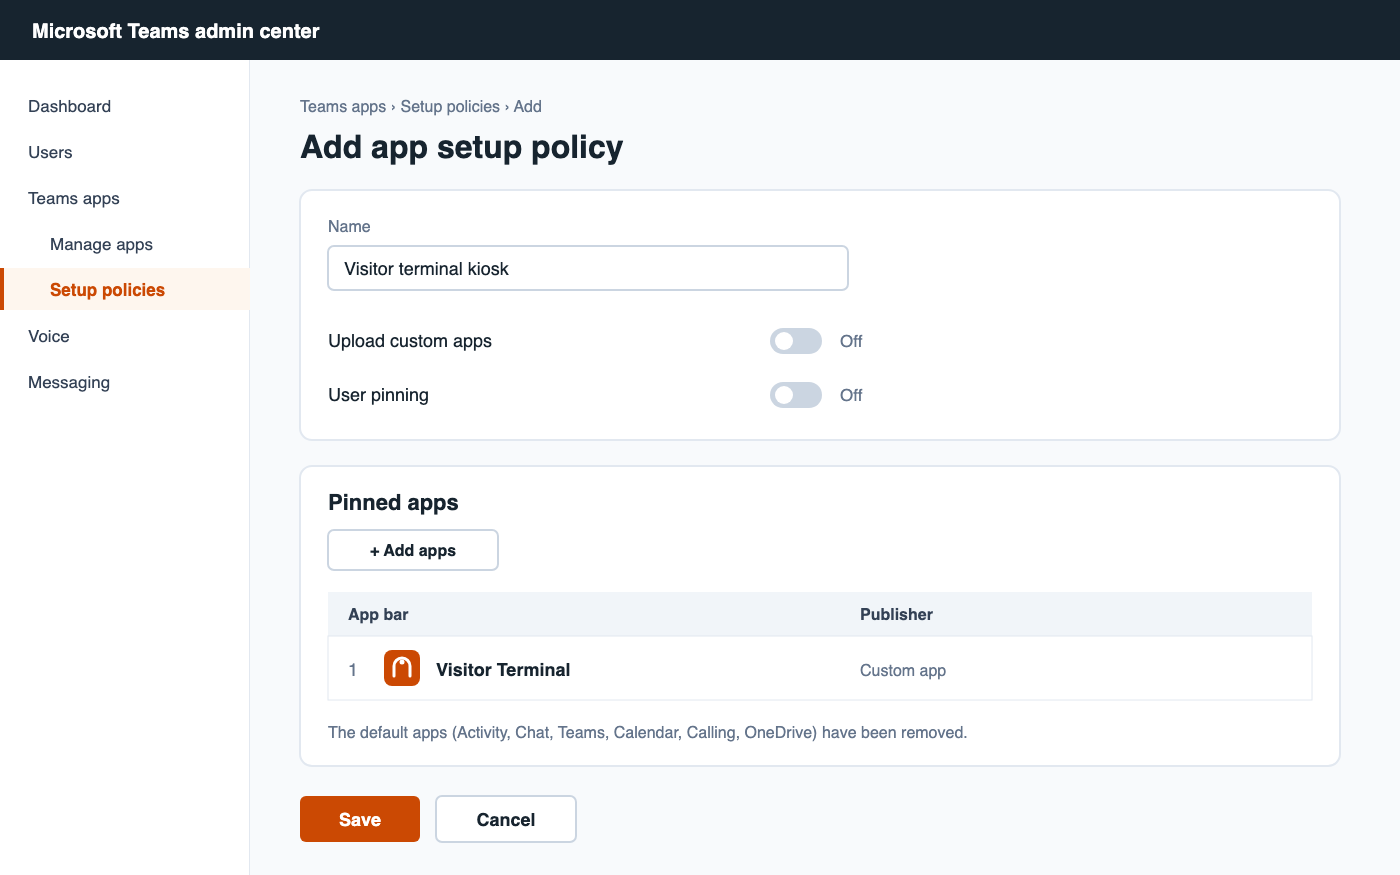
- In the Teams admin center, go to Teams apps › Setup policies and select Add.
- Give the policy a name, for example “Visitor Terminal Kiosk”.
- Switch off Upload custom apps and User pinning.
- Under Pinned apps, remove all default entries: Activity, Chat, Teams, Calendar, Calling and OneDrive.
- Select Add apps, search for your terminal app and add it. It is then the first and only app in the App bar.
- Save the policy.
Assigning the policy to the kiosk account
- Open Users › Manage users and select the kiosk account.
- Select Edit settings.
- Under App setup policy, select the new policy and confirm with Apply.
If you have several terminals, assign the policy to a group of which all kiosk accounts are members. According to Microsoft, it takes a few hours until the assignment reaches the client. Then sign out on the device and sign in again.
Teams mobile app
On iOS and Android, Teams only applies a setup policy if at least two apps are pinned. If you run the kiosk on a tablet with the mobile app, also pin “Calls” or use Teams in the browser.
Restricting Teams further for the kiosk account
The setup policy tidies up the app bar. With further policies, you prevent other Teams functions from being used at the terminal. You assign all policies to the kiosk account as described above.
| Policy | Recommended setting for the kiosk account |
|---|---|
| Calling policy (Voice › Calling policies) | Make private calls must remain switched on, otherwise the calls from the terminal do not work. You can switch off voicemail and call forwarding. |
| Messaging policy | Switch off chat so that no conversations are held or read on the device. |
| Meeting policy | Switch off scheduling and starting meetings. |
| App availability | Do not make apps that have no place at reception available to the kiosk account. The account should also not be a member of any team. |
In addition, we recommend the kiosk mode of the operating system so that visitors cannot leave Teams. Teams itself does not offer a mode that locks the program window.
Calls after check-in
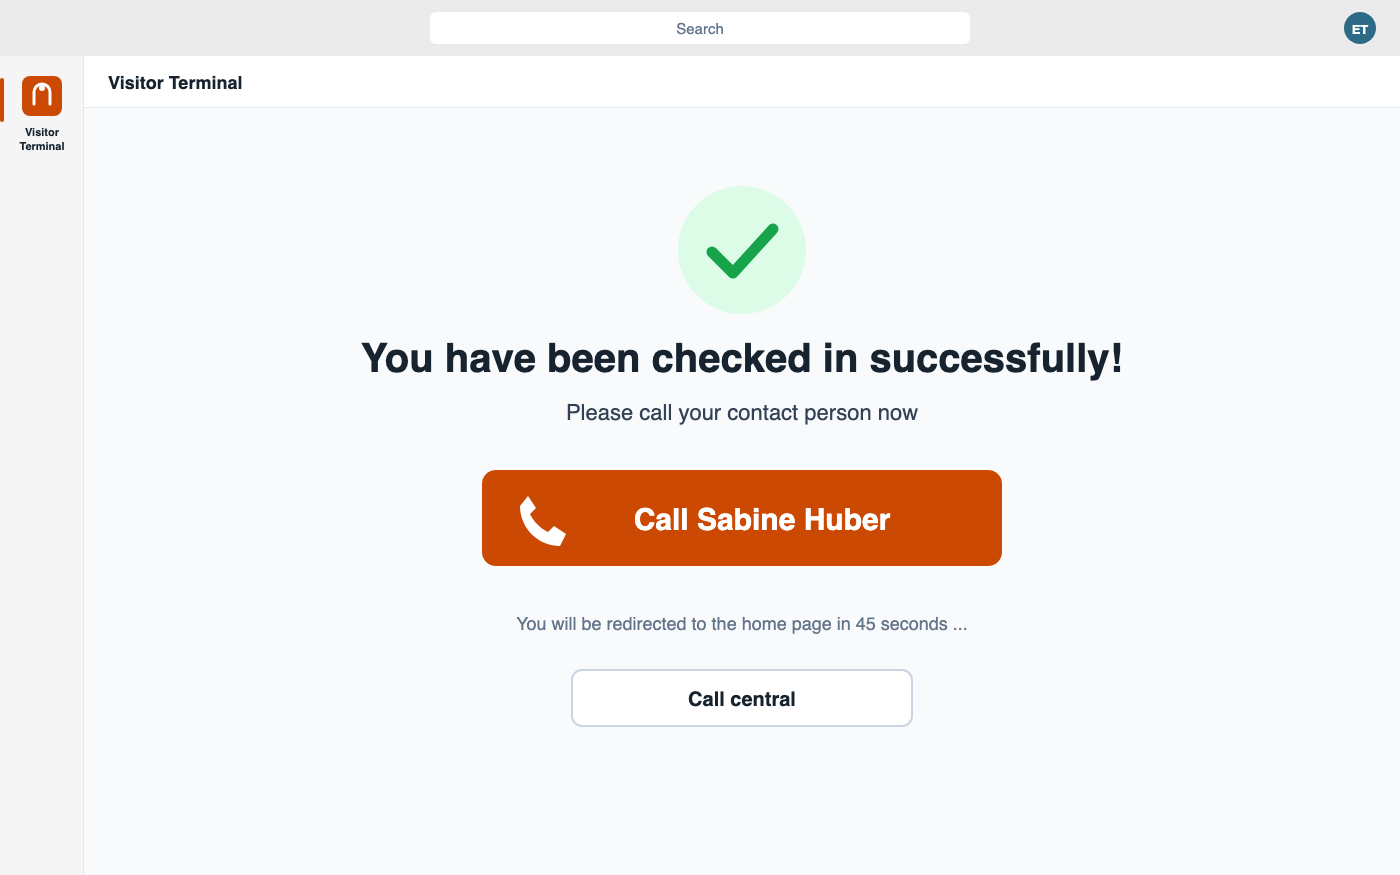
You switch on calls for each location under Check-in behavior › Enable Teams calls at check-in. After check-in, the terminal then offers:
- “Call <Name>”: if the contact person is known. For the QR check-in this is the organiser of the appointment, for the manual check-in the person selected in the people picker.
- “Call central”: if no contact person is known or the first call was not successful. This requires a Central Call Target to be entered.
- After the call, the terminal asks whether the call was successful and then returns to the home screen.
| Central Call Target | Example | Requirement |
|---|---|---|
| User or resource account | reception@yourcompany.com | Teams licence for both sides |
| Phone number | +43 2627 123456 or 4:+432627123456 | Teams Phone with a Calling Plan or Direct Routing for the kiosk account |
| Full Teams link | https://teams.microsoft.com/l/call/0/0?users=… | For special cases, such as several recipients |
Call queue as the central desk
The resource account of a call queue is a good choice for the central desk. The call then rings for several people, and nobody has to be at their desk all the time. Test the call at the terminal in advance.
Updating the app
- Change the details under Settings › Teams App and increase the version.
- Generate the package again and download it.
- Open the app in the Teams admin center under Manage apps and upload the new file with Upload file. Availability and policies are retained.
An update of the application itself does not require a new app package. The app in Teams always shows the current version of your installation.
Troubleshooting
No call button appears after check-in.
The app does not appear for the kiosk account.
The app says that you are signed in but not authorised for this area.
The camera does not work in Teams on the web.
Emails are not sent from the Teams desktop app.
Settings and analytics are missing in Teams.
Questions about this product?
Our support team is happy to help with any questions about Smarter Visitor Registration.