
Smarter O2S · Getting started
Set up and try Smarter O2S
Install Smarter O2S from Microsoft Marketplace in Outlook, enable it for your team and file your first email in SharePoint.
Open Smarter O2S in MarketplaceThe Store version does not require a separate manifest download. Your IT team can deploy the add-in centrally to users or groups.
Already set up? Go to the quick guideCheck with your IT team before you start
This guide covers the published Smarter O2S Outlook web add-in, not the previous Windows/COM add-in. Start with a small group and suitable test data. Installation, organization approval and the trial license are separate steps.
Check the prerequisites
You need a business Microsoft 365 account with Exchange Online, SharePoint Online and a provisioned personal OneDrive. Start the pilot in Outlook on the web. Test other Outlook clients with your IT team afterwards.
Your IT team must allow the Outlook add-in and sign-in to the hosted Smarter O2S app. Choose a SharePoint library where pilot users have write access. An existing Smarter Navigation configuration can be used; installing the add-in does not install an SPFx application.
Deploy the add-in
Open the Marketplace listing using the link above. Central deployment by your Microsoft 365 administrator is recommended for teams. Personal installation from the Store is an alternative if your organization’s policies allow it.
For IT: deploy centrally to users or groups
- Open Microsoft 365 admin center → Show all → Settings → Integrated apps.
- Find and select “Smarter O2S” in Microsoft Marketplace. In the alternative Add-ins dialog, choose Add-ins → Deploy Add-in → select from Microsoft Marketplace.
- Check the name “Smarter O2S”, publisher “Smarter Business Solutions GmbH”, terms and requested permissions. Assign only the agreed pilot group initially, then complete deployment.
- Distribution may take time. Reopen Outlook and check “Apps” afterwards. Entra consent in the next step does not replace assigning the add-in.
Alternative: install personally, if permitted
- Open the linked “Smarter O2S” Marketplace listing and sign in to the correct business account.
- Check the publisher “Smarter Business Solutions GmbH” and choose Get it now.
- Review the app details, terms and permissions and follow the Microsoft installation flow. Then open Smarter O2S under Apps in Outlook.
- If this option is missing or blocked, do not bypass the policy: ask your IT team to deploy the add-in centrally.
Already tested the preview?
“Smarter O2S Preview” and the Store version “Smarter O2S” are separate add-in entries. Install and check the Store version with your IT team before removing the earlier deployment. Installation does not restart a trial or change an existing COM license contract.
Sign in and approve permissions
Open an email in Outlook and choose “Smarter O2S” under “Apps”. Depending on your Outlook version, “Apps” appears in the ribbon or on the message itself. Pin the pane if you want it to stay open when switching emails.
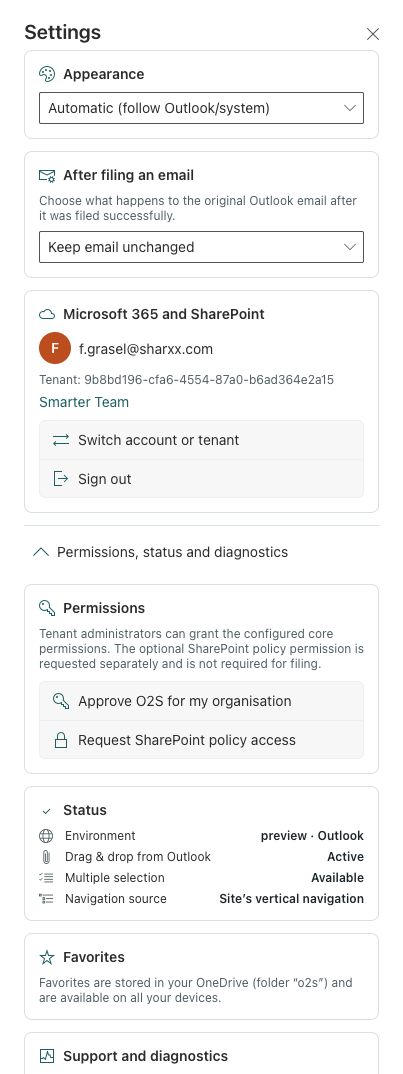
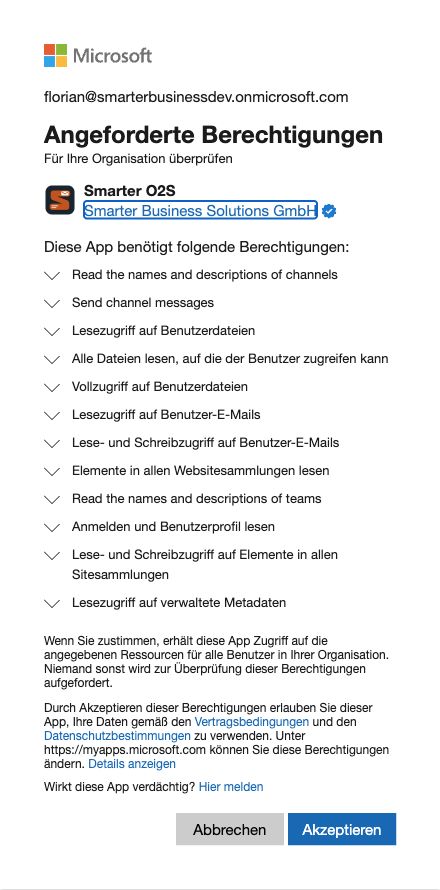
For initial setup, an authorised tenant administrator chooses “Approve O2S for my organisation” in the Outlook pane. In an already connected app, use the profile icon → Settings → Permissions, status and diagnostics. Microsoft shows the configured standard permissions together for review. Allow the separate Microsoft window if Outlook asks.
After approval, O2S automatically connects the same business account and checks SharePoint and personal OneDrive. Microsoft may still require sign-in or MFA; this is not another approval of individual product permissions. Complete that step and wait for the O2S workspace to open.
Colleagues choose “Connect Microsoft 365 account”. The organisation approval already covers them, while their own SharePoint access rights still apply. If administrator approval is required, your IT team must complete it — repeated sign-in does not replace approval.
Installing the Outlook add-in and granting Microsoft Entra consent are separate steps. Permissions are delegated: O2S acts on behalf of the signed-in user and does not grant them additional access to other SharePoint content. The scopes are nevertheless broad and require your IT team’s review.
What is each permission used for?
- Office: ReadWriteMailbox
- Outlook multi-select and email/draft actions. This manifest permission is separate from Microsoft Graph and SharePoint scopes below.
- Graph: User.Read; openid, profile, offline_access
- Sign in to the business account, establish user context and renew the session.
- Graph: Mail.Read
- Read selected emails and attachments for filing and location suggestions.
- Graph: Mail.ReadWrite
- Optional post-filing actions such as categorising, moving and archiving, plus draft actions. No automatic email sending.
- Graph: Sites.Read.All
- Discover SharePoint sites and trusted tenant context, delegated within the user’s access rights.
- Graph: Files.Read, Files.ReadWrite, Files.Read.All
- OneDrive/document context and supported document/sharing actions. Files.Read.All covers all files accessible to the user, not just one selected folder.
- SharePoint: AllSites.Write
- Read navigation and write emails, files and metadata to the selected location. Personal OneDrive storage also uses a SharePoint token with the correct audience.
- SharePoint: TermStore.Read.All
- Read managed-metadata terms. Does not administer the term store.
- Graph: Team.ReadBasic.All, Channel.ReadBasic.All, ChannelMessage.Send
- Find Teams/channels for the document action and send a channel link after explicit confirmation. Not needed for ordinary email filing.
- Optional: SharePointTenantSettings.Read.All
- Read organisation-wide sharing policies more precisely. Separate optional administrator consent; not required for the first filing test.
Do not create a separate app registration for the hosted version. Check the client ID below, “Smarter O2S” and the verified publisher “Smarter Business Solutions GmbH” in the Microsoft dialog. An administrator approves the standard permissions together. The verified badge confirms the publisher identity; it does not replace reviewing permissions or granting organisation approval. “Request SharePoint policy access” is separate and optional — do not select it for the first filing test. Changed permissions or organisation policies may require new approval later.
Hosted add-in client ID: 0dee075f-e2df-448d-97da-b53b2d604a80
Start one 14-day trial for your organisation
If your organisation has no trial yet, choose “Try free for 14 days” directly in O2S. The initiator confirms their business contact email for trial setup and evaluation, and accepts the terms and privacy notice. Additional O2S product news and tips by email are a separate, optional choice.
There is no additional sign-in on a licensing website. After starting the company trial, O2S displays the shared expiry date. Other users in the same Microsoft 365 tenant do not register another contact and use the remaining trial time. Your IT team still needs to provide the add-in and the required data access.
The fully featured 14-day trial starts with the first successful registration, not installation. Different email domains, users or reinstallation do not start a new trial. There is no automatic purchase or paid renewal. After expiry, “Contact us about Smarter O2S” leads to our contact page.
File your first email in SharePoint
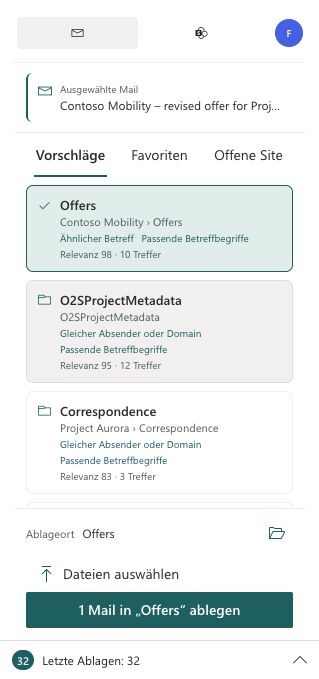
Select an email in Outlook. In “Mail”, choose a suggested location, or use “Favorites” or “Open site”. A site favorite opens its navigation; select the destination library or folder there.
Check the displayed filing location, then choose the save email action. If relevant required metadata remains empty after upload, O2S opens the form: complete the values and save. No extra input is needed when no such values are missing.
Wait for the upload to finish. Check the entry under “Active” or “Recent filings” and open the saved file. O2S then shows the filing location on the email. Categories or moving the original email depend on your settings.
Work in SharePoint — without leaving Outlook
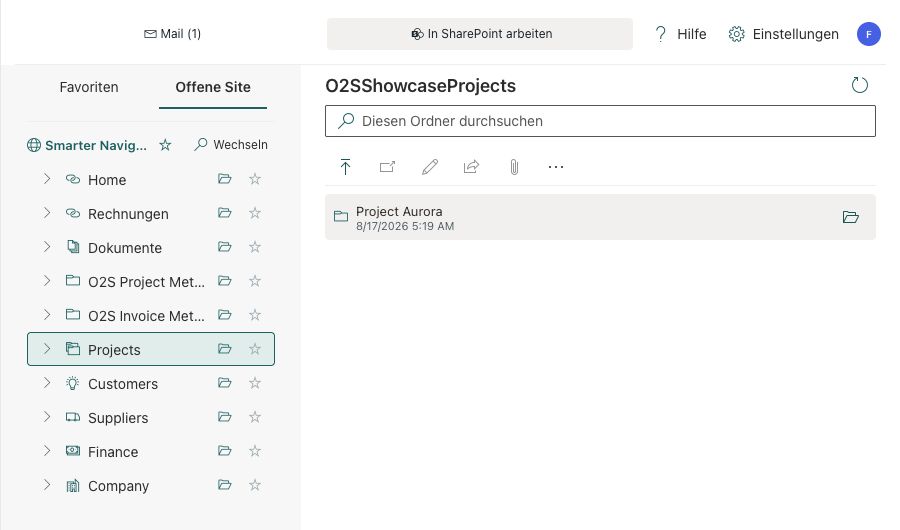
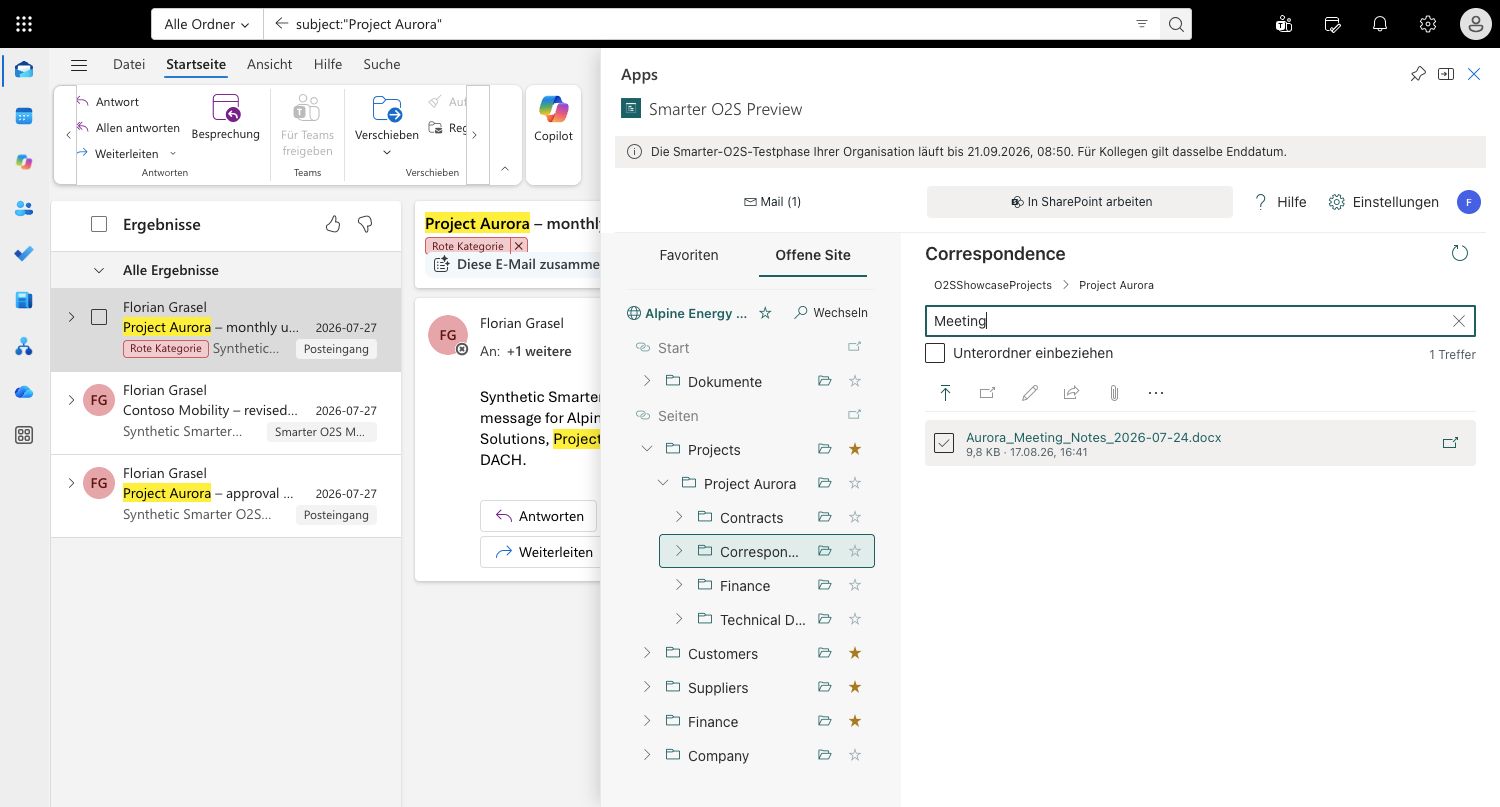
Switch to “SharePoint” or “Work in SharePoint” and open your library. The expanded Outlook pane shows navigation alongside folder contents.
Use “Choose files” to prepare local files. Alternatively, drag files or supported Outlook emails onto a destination folder or into the open workspace. Check files and destination under “Active” and confirm “Upload items to SharePoint”. Complete missing required metadata afterwards. Files in the SharePoint workspace do not inherit metadata from an unrelated email that happens to be open in Outlook.
Search the current folder. Once you enter a search term, you can include subfolders. Newly uploaded files may take time to appear in SharePoint search; check the folder list first.
Select a document to open, edit, preview or use link actions. Available actions depend on file type, selection and permissions. “Recent filings” leads to previous results. The internal metadata editor is available for current uploads under “Active”; edit older documents in SharePoint. Check recipients and access permissions before sharing content.
Quick start: five steps for everyday work
Add-in installed and Microsoft 365 connected? Use these five steps to check your first complete workflow.
- Choose an email and destination
Select an email in Outlook. In Mail, choose a suggestion or navigate to the destination library through Favorites / Open site.
- Start filing explicitly
Check the displayed destination and file the email. For file selection or drag & drop, also confirm the prepared items for upload under Active.
- Complete required fields
If a metadata form opens after upload, complete the missing values and save. No additional input is needed when no relevant required fields are missing.
- Check the result
Active shows current work and metadata follow-up. Recent filings shows successful filings: the filename opens the file; the destination opens the folder in O2S.
- Find and use documents
Switch to Work in SharePoint, open a folder and search. Select a document and use an action such as Preview or Copy links.
If something does not work as expected
- Add-in missing
- Check pilot-group assignment and organisational policy; reopen Outlook after deployment. Do not use old COM installers.
- Site or file missing
- Check SharePoint using the same account first. New content may not be indexed yet. Open a site by its link if access is allowed.
- Upload or metadata fails
- Check the destination, write permissions and required fields. Read the upload status before trying again to avoid duplicate files.
- Sign-in or trial fails
- Check the account, administrator approval and network access. Give support the short error reference, time and Outlook client — never send tokens, passwords or confidential email content.
SharePoint Online and existing libraries/folders are supported. SharePoint on-premises, creating folders, whole Outlook-folder migration and mobile Outlook are not supported.
Questions about this product?
Our support team is happy to help with any questions about Smarter O2S.