Getting Started with Smarter Event Booking
Complete guide for installation, configuration, and using Smarter Event Booking. From initial installation to managing events and participants.
Table of Contents
Installing the App
Install Smarter Event Booking in your SharePoint tenant and on your site collection.
Important
Installation occurs in two steps: First in the tenant app catalog, then on the respective site collection.
1. Add App to Tenant App Catalog
To use Smarter Event Booking, the app must first be added to the tenant's app catalog.
Helpful guide
2. Add App to Site Collection
After tenant installation, you can add the app to your site collection via "Add an app".
Microsoft guide
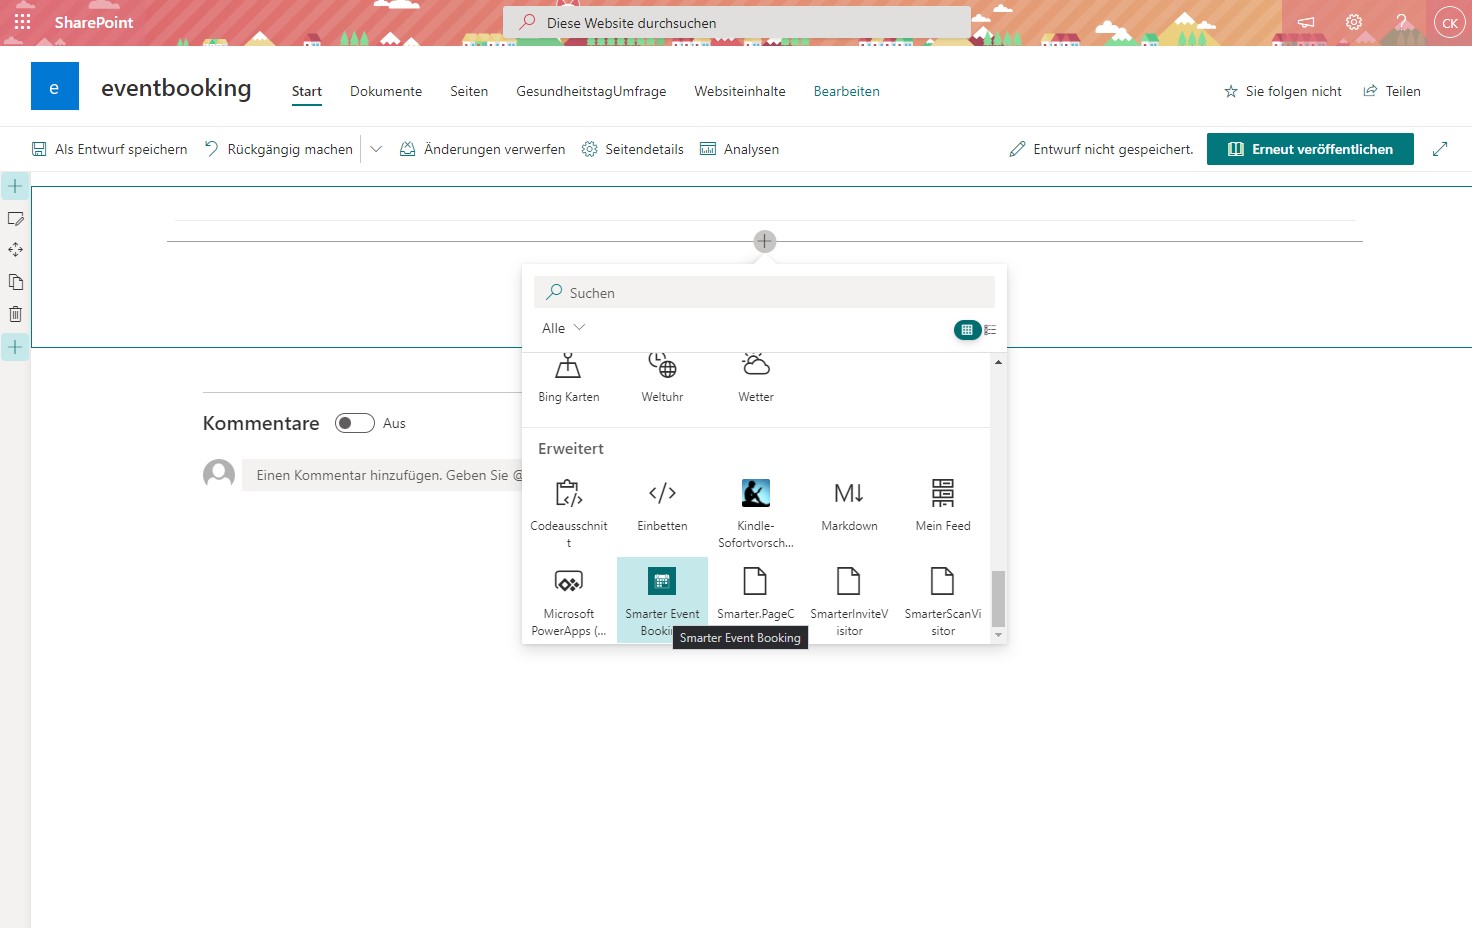
3. Add Webpart to SharePoint Page
After successful installation, the Smarter Event Booking SPFx webpart can be added to any SharePoint page.
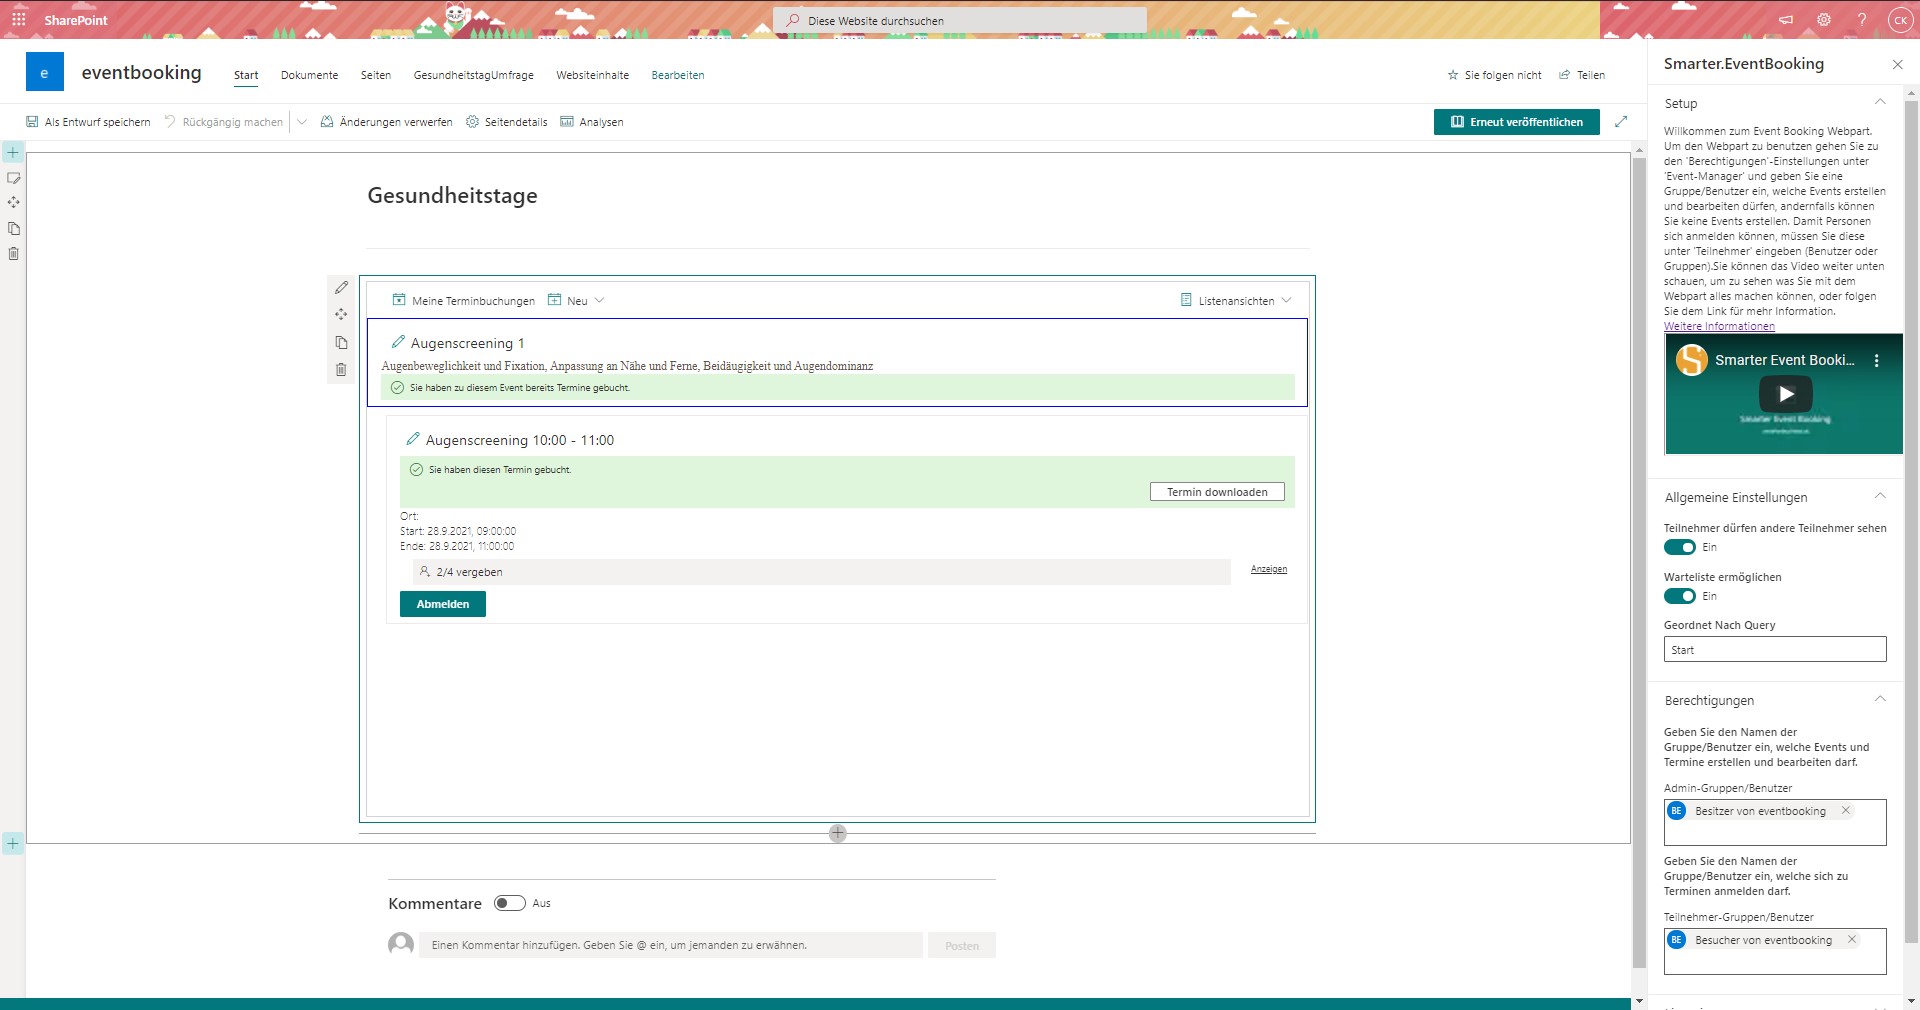
Configuring Webpart Settings
Configure permissions, waitlists, and email templates via the webpart settings.
User Settings
Users can see other participants • Enable waitlists for fully booked events
Permissions
Assign administrators/editors • Grant participant permissions
Email Templates Feature
Configure automatic confirmation emails sent when registering for events, including ICS calendar entry for Outlook.
Creating Events
As an administrator, you can create and configure new events.
Create Event
Click "New" and select "Event". Enter title, description, and other details.
Add Appointments
After creating the event, add appointments. Each event can have multiple appointments.

Configuring Appointments
Configure appointments with start/end times, participant limits, and email settings.
Appointment Settings
Start and End Time
Define when the event starts and ends
Registration Deadlines
Set registration and cancellation deadlines
Participant Count
Set maximum number of participants
Email Template
Configure automatic confirmation emails
Information Material
Attach files for participants
Important
Past events are no longer displayed to users for registration.
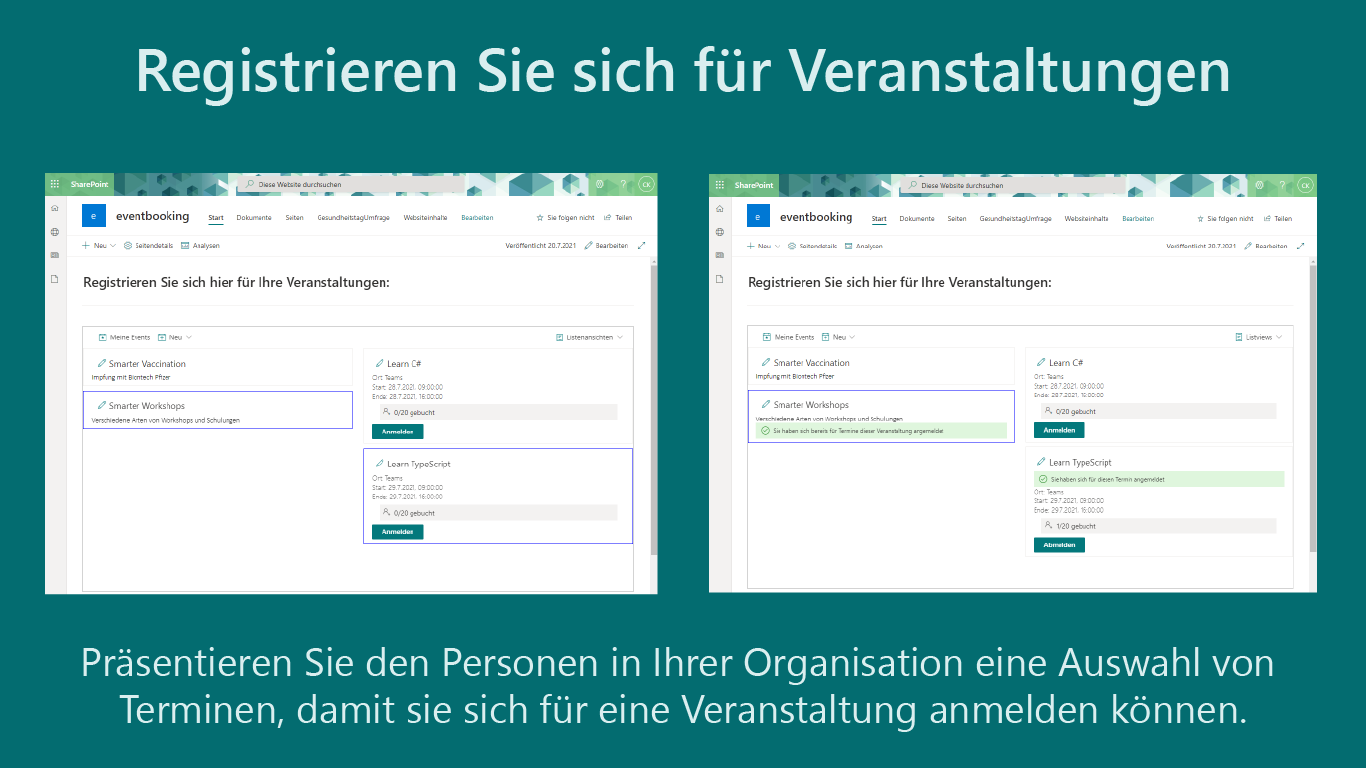
Event Registrations
How registration works for users and managing participants.
Registration
Spots Available
Users can register directly when spots are available. They automatically receive a confirmation email.
Waitlist Enabled
For fully booked events, users can join the waitlist (if enabled).
User Features
View Participants
If enabled in settings, users can click "Show" to see all participants.
My Bookings
Users can view all their registrations via "My Appointments".
NEW: Calendar View
Enable calendar view to see all event appointments at a glance. Highlight: Booked appointments are highlighted in green!
Editing and Deleting
Edit or delete events and appointments via the webpart or list views.
Edit via Webpart
Click the pencil button in the webpart to quickly edit events or appointments. (Recommended: Easiest method)
Edit via List Views
Click "List Views" and select a list for direct access to all items. (Advantage: Bulk operations)
Important Note for Internet Explorer 11
Editing items doesn't work in IE 11 when ModernView is enabled in lists. Use a modern browser like Edge, Chrome, or Firefox.
Frequently Asked Questions
Why aren't past events displayed?
How does the waitlist work?
Are Outlook calendar entries created automatically?
Can I create multiple appointments per event?
Questions about this product?
Our support team is happy to help with any questions about Smarter Event Booking.