Office 2 SharePoint
User Guide
Download Office 2 SharePoint now
Download O2S for free and try it out. Experience why thousands of users rely on it every day.
Installation requirements:
Need help with the download? Get in touch!
Inhaltsverzeichnis
Office 2 SharePoint (O2S) User Guide
This is the complete user guide for our Outlook add-in Office 2 SharePoint (O2S). You can download the PDF version here. If you have any questions, please contact our support team.
Installation
1.1 System requirements
O2S is compatible with the following software:
Operating systems
Windows Vista/7/8/8.1/10, Server 2008/2013/2016
Office versions
Office 2010/2013/2016/2019, Office 365
SharePoint
SharePoint 2010-2019, SharePoint Online, All authentication types
Additional requirements
Internet Explorer 8+, .NET Framework 4.0 (full version)
Important note
1.2 Installation options
There are generally two different ways to install O2S. Both require administrator privileges!
Installation via setup.exe
The easier installation option with graphical user interface.
Installation via setup_package.msi
For advanced users and system administrators.
1.3 Installation process via Setup.exe
Before installation
- • O2S will be installed for all users on the system
- • Registry entries are located under
HKEY_LOCAL_MACHINE - • Close all running Microsoft Office products
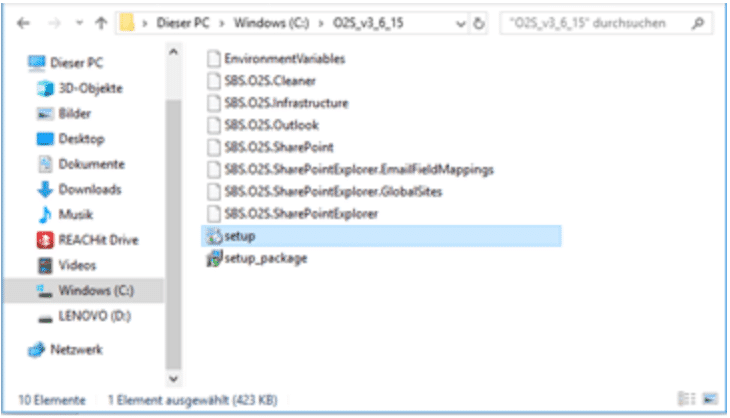
Start setup file
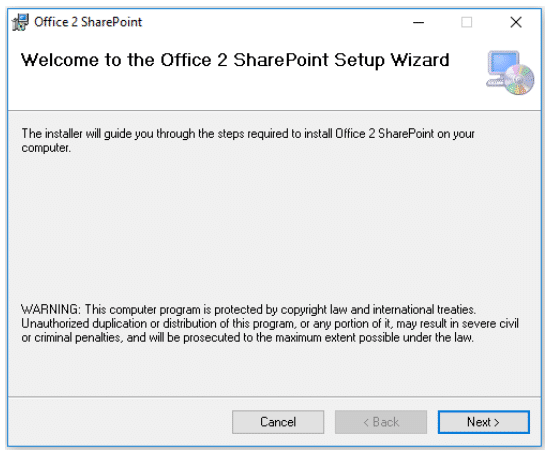
O2S Installation Setup Wizard
Installation step by step:
- Double-click the setup.exe file
- Confirm start with "Yes"
- The O2S Installation Setup Wizard opens
- Follow the instructions in the setup wizard
- Click "Next" to continue
- Complete the installation with "Close"
Product activation
To use Office 2 SharePoint, the add-in must be activated. Activation is done via a license key that you receive from our support team.
Activation steps
- Open Microsoft Outlook
- In the Outlook start ribbon, you'll find the new O2S buttons on the right
- Click "Navigation" - the O2S app opens on the right side of the screen
- Enter the activation code in the designated field
- Click "Activate"
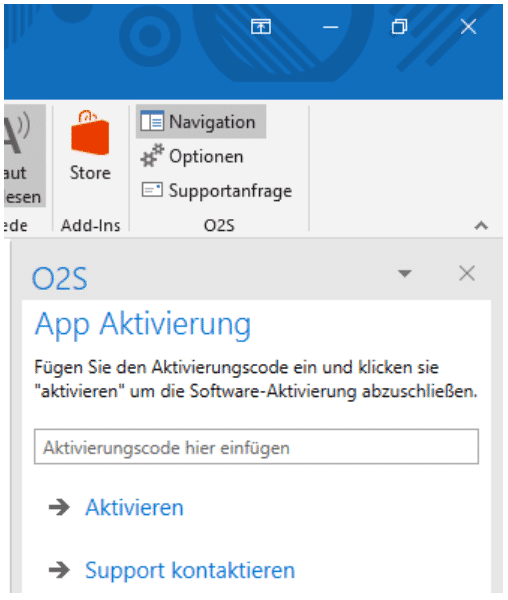
Office 2 SharePoint activation dialog
First installation
If you're installing O2S for the first time, you'll need to create SharePoint connections and navigation groups first (see Chapter 4).
Update/Upgrade
When updating from an earlier O2S version, your settings, connections and groups will be automatically transferred.
Layout & usage
3.1 Show and hide O2S in Outlook
O2S can be shown or hidden in the upper right corner of the Outlook start ribbon by clicking "Navigation" and clicking again to hide it.
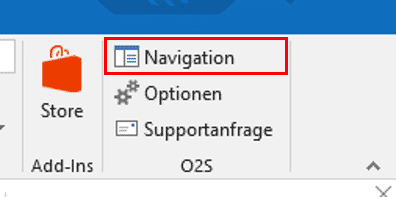
Show and hide navigation
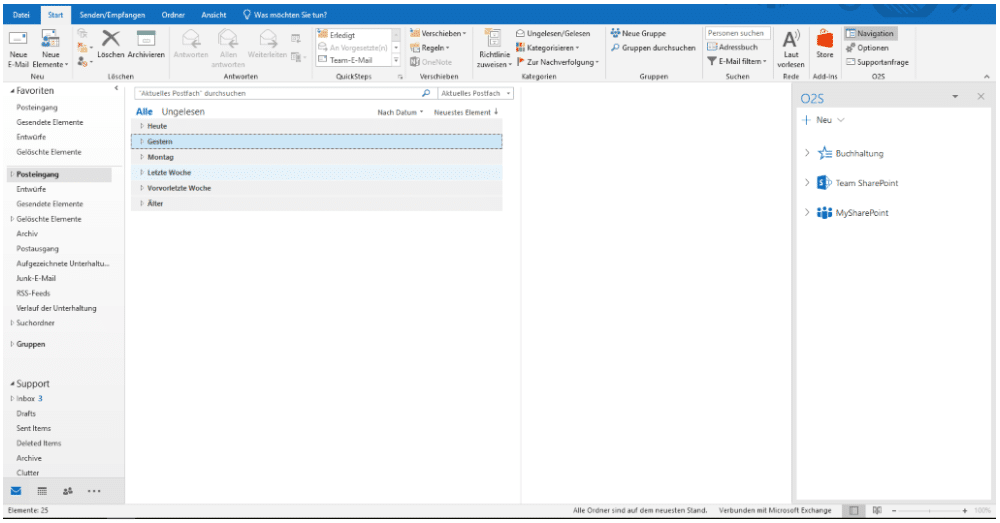
Office 2 SharePoint navigation window
3.2 O2S Add-in window
At the top level of O2S, the following elements are visible:
- • Existing groups: If you had an older O2S version, you'll find all installed groups and links here
- • "+ New": Here you can create new groups or new SharePoint connections
- • Menu icon (▼): The small triangle opens a menu for moving, resizing or hiding
3.3 O2S Workspace window
When working with O2S, a dedicated workspace window appears in the center of Microsoft Outlook, which automatically adjusts its size.
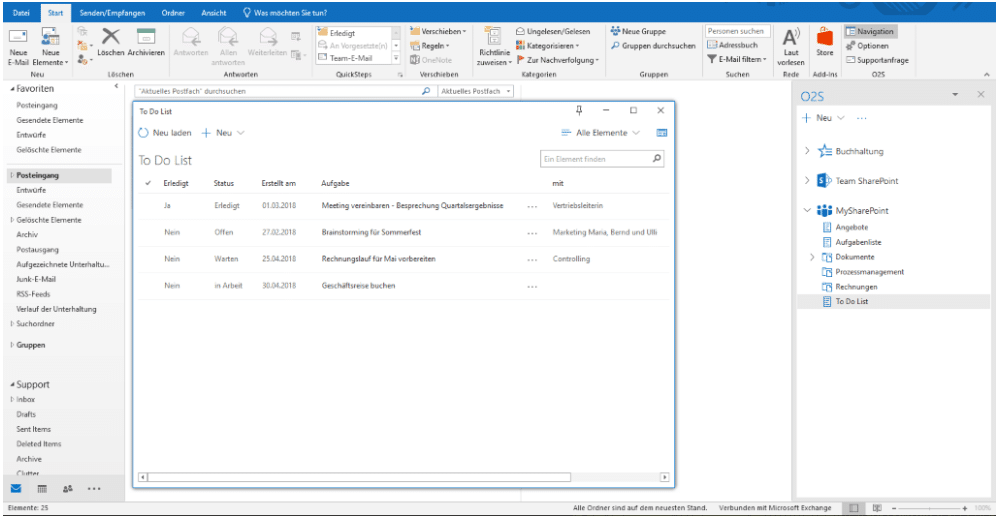
Office 2 SharePoint workspace window
Pin window
Working with O2S
4.1 Adding SharePoint pages
When you're in O2S, there are basically two different ways to connect your SharePoint pages:
Option A: Connect SharePoint
- Enter your SharePoint URL
- Click "Next"
- Optional: Customize name
- Select storage location
- Complete with "Save"
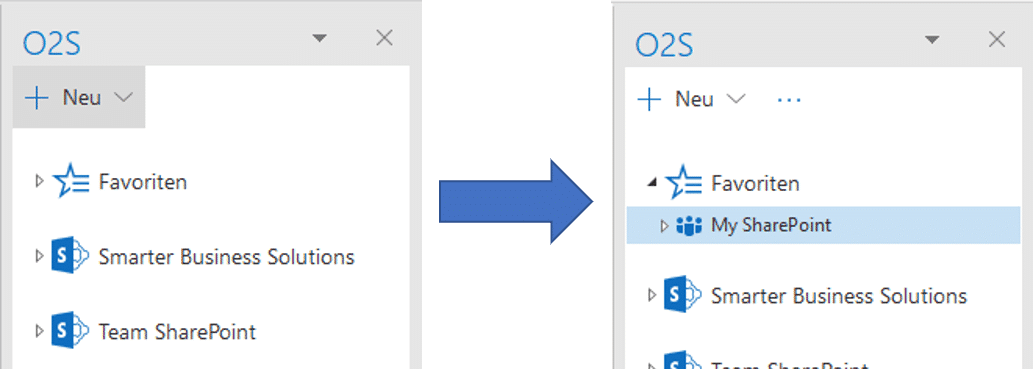
Option B: Drag & Drop
- Select URL from browser window
- Drag into O2S navigation
- Optional: Customize name
- Select navigation group
- Complete with "Save"
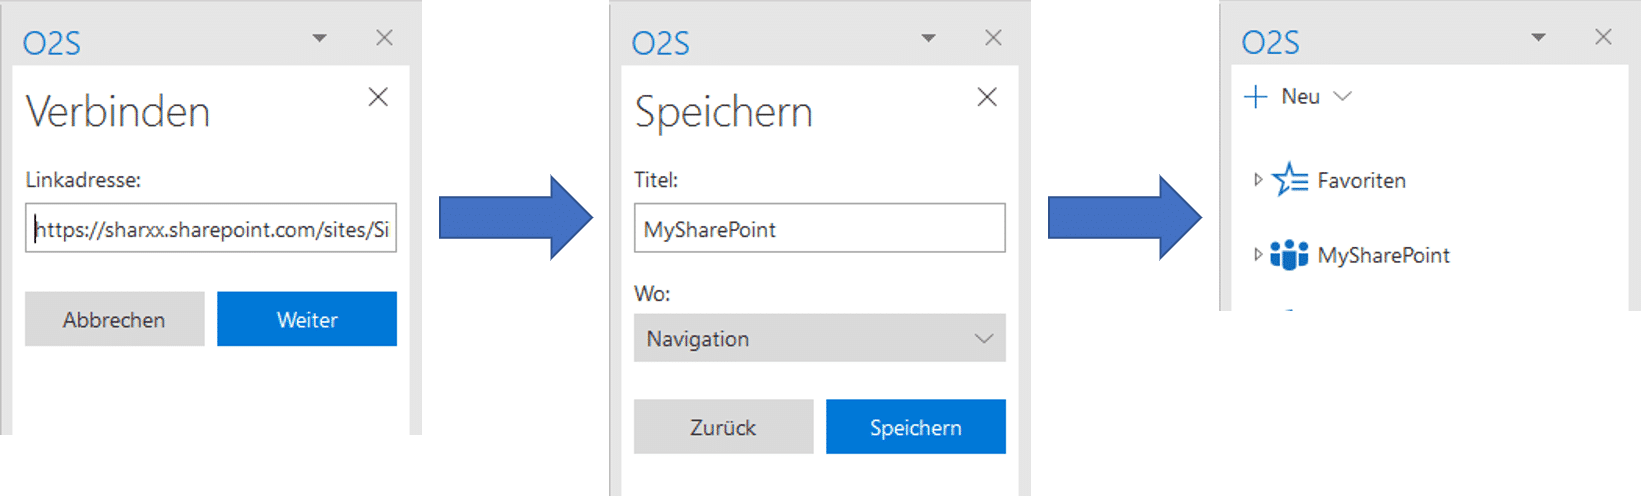
SharePoint connection via URL input
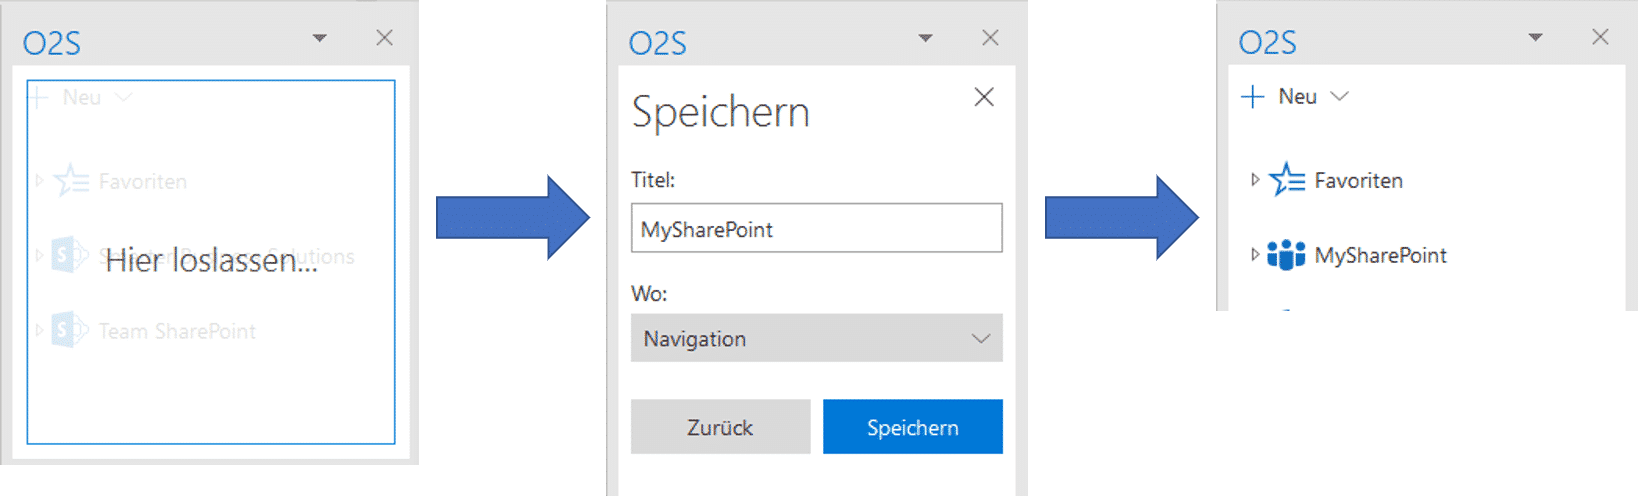
SharePoint connection via Drag & Drop
4.2 Adding custom navigation groups
Groups allow you to structure SharePoint elements individually according to your needs.
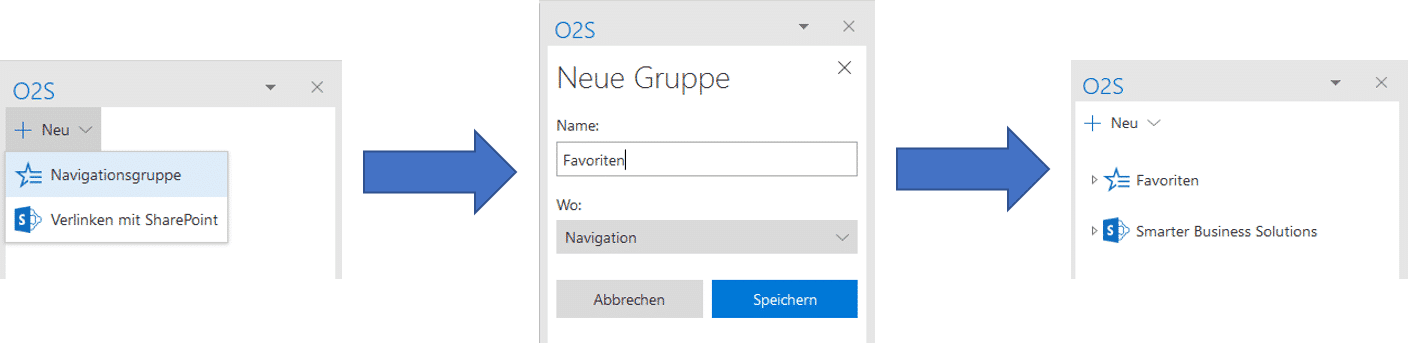
Create new navigation group
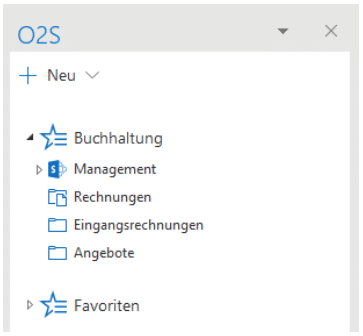
Group SharePoint pages
Add elements to group
Working with the O2S workspace window
5.1 Layout and operation
By clicking on the desired list in the navigation, the workspace window opens in the center of Microsoft Outlook, providing advanced features for SharePoint management.
Reload
Load current SharePoint changes
+ New
Create new items or folders
Drag & Drop
Easily upload files
Filter & Sort
Organize lists
List views
Use SharePoint views
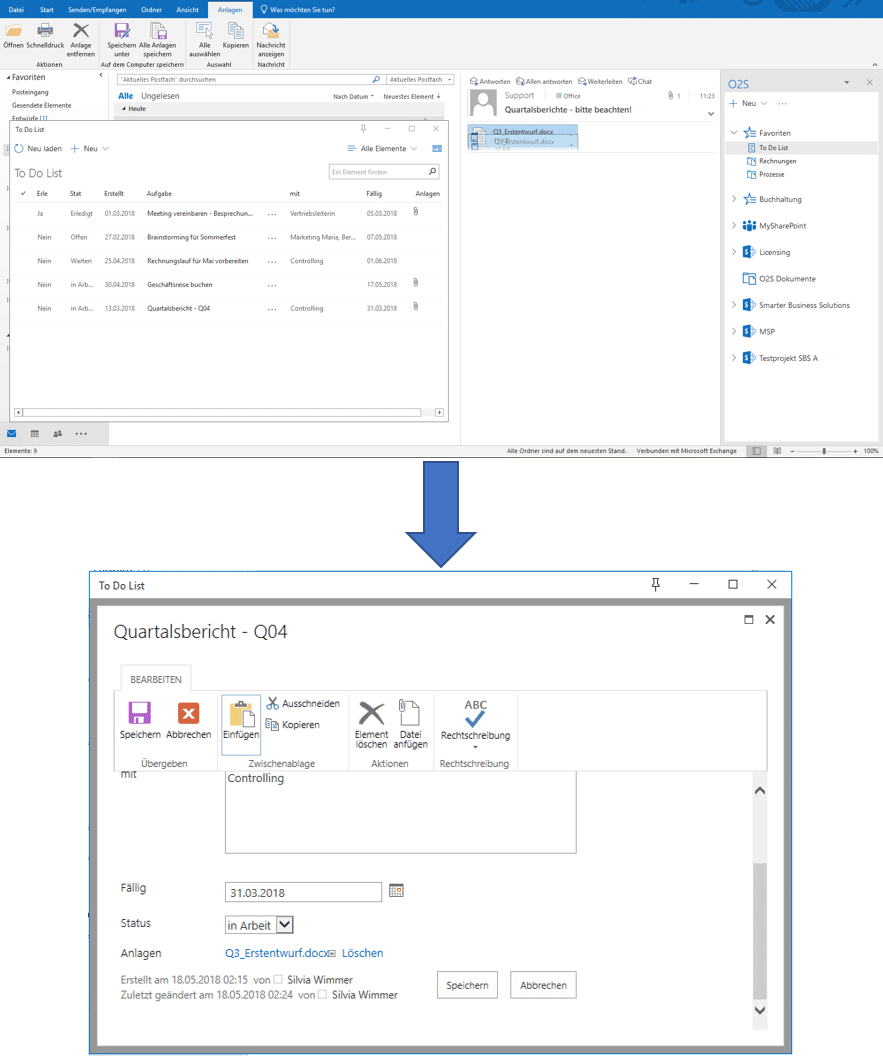
Properties
Form icon for metadata
Pro tip: Search function
Working with a list in O2S
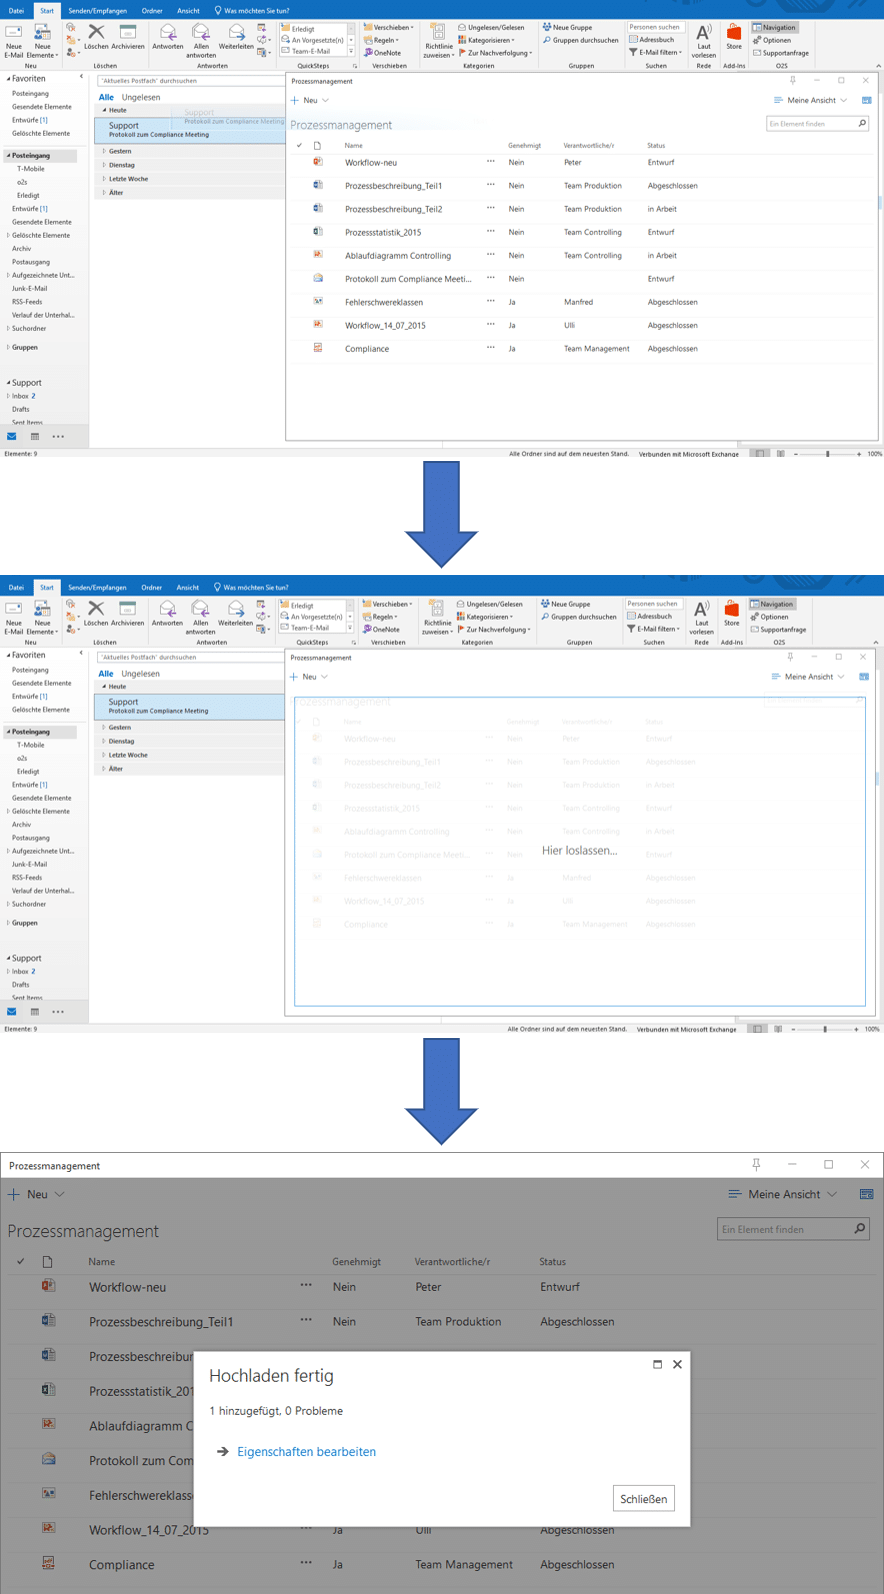
6.1 Uploading documents and e-mails
O2S offers various ways to upload documents and e-mails to SharePoint lists and libraries.
+ New button
Create new documents/folders
Drag & Drop
Drag files directly in
E-mail upload
E-mails as list entries
Attachments separately
Upload only attachments
Upload documents to SharePoint library
Archive e-mails directly in SharePoint
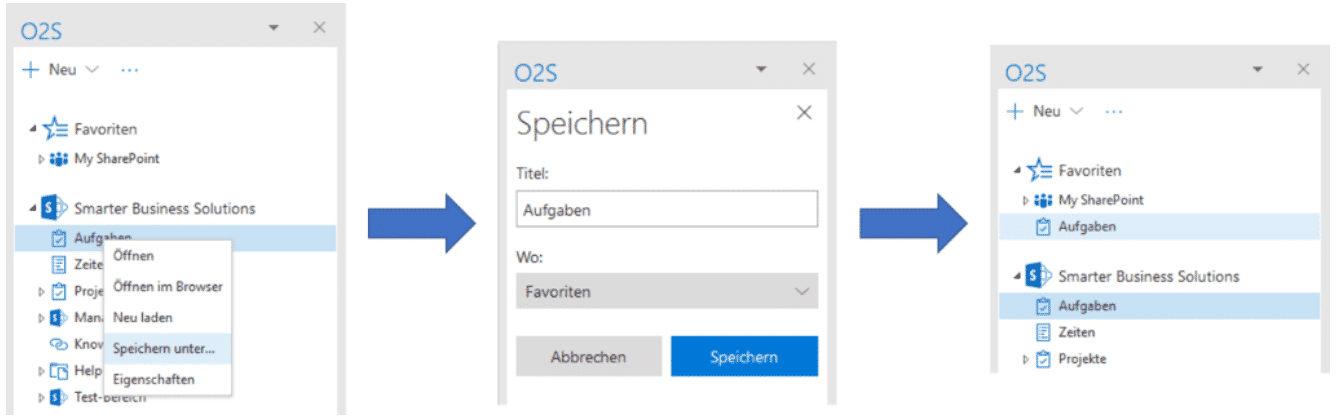
6.2 Functions for list items
After selecting one or more items, the following functions are available in the context menu (right-click):
Document functions
- • Open
- • View item
- • Edit item
- • Check out
Clipboard
- • Copy file
- • Copy link
- • Download copy
E-mail integration
- • E-mail file
- • E-mail link
- • Send link
Office integration
Working with an e-mail library
7.1 Archive e-mails in SharePoint
With O2S, you can seamlessly archive e-mails in SharePoint libraries. E-mail metadata is automatically transferred to corresponding SharePoint fields.
Drag & Drop
Drag e-mails directly from Outlook into O2S
Multiple selection
Archive multiple e-mails simultaneously
Attachments separately
Save only attachments or only e-mail
Automatic metadata
Sender, recipient, subject, date
Adopt categories
Outlook categories in SharePoint
Full-text index
E-mail contents searchable
7.2 Extend library to e-mail library
In O2S, you can extend an existing library to a special e-mail library.
Extension steps
- Select the desired library via right-click
- Open the context menu and select "Properties"
- Click "Extend e-mail library"
- After a short loading process, confirmation appears
- Click "Close"
Troubleshooting
Settings
You can make additional settings for your O2S via the O2S options. Click "Options" in the Outlook start ribbon to open the settings window.
O2S menu with options button in Outlook
8.1 General settings
8.1.1 Customize
Here you'll find the language settings for O2S, as well as various color schemes to give your O2S a personal touch.
8.1.2 Privacy
O2S must temporarily store files in a manually definable folder for uploading/downloading. Here you can configure automatic deletion settings.
8.1.3 Information
Under this section, you'll find general information about your O2S product, as well as all other installed Smarter Business apps.
8.2 O2S specific settings
View options:
- • Enable line breaks: Better readability of long texts
- • Set maximum column width: Fixed width for all columns
Upload settings:
- • Automatically close dialog after successful upload
- • Automatically shorten long file and folder names
- • Automatically rename e-mail names for duplicates
- • Mark uploaded e-mails as read
- • Categorize uploaded e-mails
- • Move uploaded e-mails to Outlook folder
Contact support
Clicking "Support request" in the Outlook start ribbon opens a new e-mail to our support: support@smarterbusiness.at
Support function
- Click "Support request" in the O2S start ribbon
- A new e-mail opens automatically
- The support e-mail address is already entered as recipient
- Describe your issue in the e-mail text
- Attach screenshots or log files if needed
- Send the e-mail
Support function in O2S menu
O2S navigation window with options
Helpful information for support requests
- • O2S version: Found in settings under "Information"
- • Error messages: Screenshot or exact error message
- • SharePoint URL: Affected SharePoint page
- • Reproduction steps: What did you do when the error occurred?
- • Outlook version: Your Microsoft Outlook version
Administrator guide
10.1 Installation process via setup_package.msi
For organization-wide rollout via deployment software, the MSI of the installation package can be used.
Progress dialog without user interaction:
msiexec.exe /i "<PATH>\\setup_package.msi" /qb
Or without visual display (silent installation):
msiexec.exe /i "<PATH>\\setup_package.msi" /qn
10.2 User management
Authentication for users working with O2S is done via the Windows Credential Manager.
Credential management
Saved credentials can be found in Control Panel under:
Control Panel → User Accounts → Credential Manager → Windows Credentials
Entries used by O2S are marked with the prefix SBS.O2S:
10.3 XML configuration files
O2S uses several XML configuration files for advanced settings:
SBS.O2S.SharePointExplorer.xml
Central configuration file with application and navigation settings, silent activation, browser authentication and connection limits.
SBS.O2S.SharePoint.xml
SSL certificate settings, proxy configuration, ADFS configuration and multilingual settings.
SBS.O2S.SharePointExplorer.EmailFieldMappings.xml
Detailed settings for e-mail mappings to corresponding fields in an O2S e-mail library.
Important note for administrators
Need Support?
Our support team is happy to help you with any questions about Office 2 SharePoint.