A customer recently asked for a more user-friendly way to browse images in SharePoint. The classic list view felt clunky, so I tested a lightweight gallery approach that needs only a few files and works reliably (verified with SharePoint 2013).
Why build a dedicated gallery?
A clean gallery keeps people from scrolling through endless rows and instead lets them click through visual previews. All items continue to live in the SharePoint image library, so you still benefit from permissions, versioning, and search.
Step-by-step guide
Prepare the files
-
Create a folder inside the Style Library, for example
Siteurl/StyleLibrary/ImageGallery, and store all assets there. -
Download the Galleria library or, alternatively, my ZIP package. You will need the following files:
jquery-1.11.0.min.js galleria-1.3.5.min.js classic.min.js classic.css classic-map.png classic-loader.gif -
Upload every file to the new folder and add a
DisplayGallery.txtfile that will later hold the script.
Build the library and view
- Create the image library that should surface the gallery.
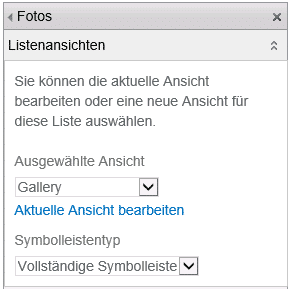
- Add a new view based on All Pictures, but show only the Name column.

Configure the page and web parts
- Create a page, add the image library web part, and set the freshly built view as the default.
- Insert a Content Editor Web Part and link it to the
DisplayGallery.txtfile.
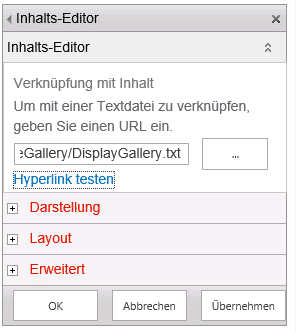
- If you stored the folder under a different path, update each of the four path references inside
DisplayGallery.txtso the scripts and CSS load correctly.

Follow-up tip
Want to enrich the gallery with metadata? Learn how to import EXIF information automatically in Import EXIF Data into SharePoint Image Libraries.
Happy coding!
Best, Stefan