
Do you and your team use Microsoft Planner to quickly set up tasks?
Then you’ve probably noticed a small but very useful feature is missing: recurring tasks in Microsoft Planner.
Out of the box, Planner can’t create tasks on a schedule and reassign them automatically. In this guide, we’ll show a practical approach to implement recurring tasks using a SharePoint list and Microsoft Power Automate—fast and with minimal overhead.
SharePoint list for recurring tasks
Start by defining your recurring tasks in a simple, clear list:

- Title
The name of the recurring task to create. - Interval
The number of days between task occurrences. - LastCreationDate
For logging only; remove it if you don’t need it. - NextCreationDate
The date when the task should be created next. Once your flow runs, this field is automatically updated with the newly calculated date. When defining a task, set the initial creation date here. - UserToAssign
A multi-user field for the people who should receive the task. - Description
A short description to complement the task title.
Power Automate to create recurring Planner tasks
The automation consists of three main steps:
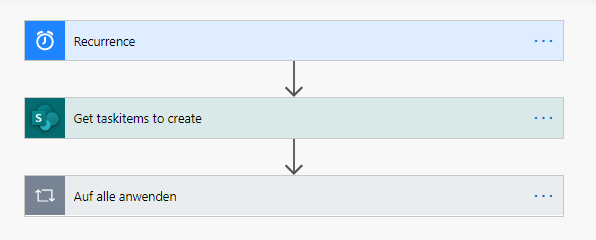
First, configure the recurrence. Next, query your task definition list for items that are due. Finally, create the tasks and update the definitions.
Recurrence
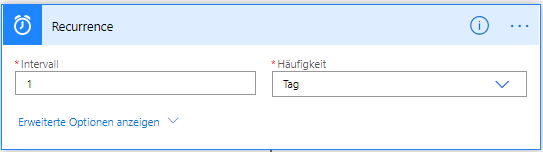
Here you set how often the flow runs and looks for tasks to create. In this example, it checks the list once per day and creates any tasks that are due.
Load relevant task definitions
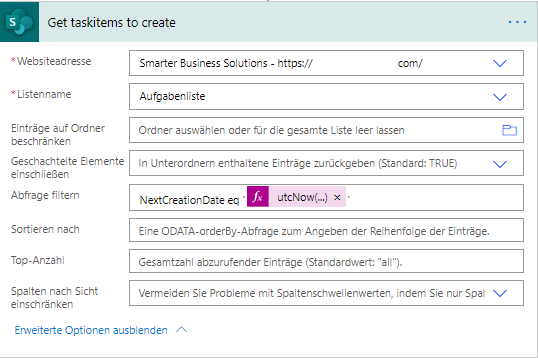
A simple query against the task definition list returns the items to create. We filter on NextCreationDate and compare it with today’s date. If it matches, the item is included in the creation batch.
Pre-calculations
First, calculate the task due date:
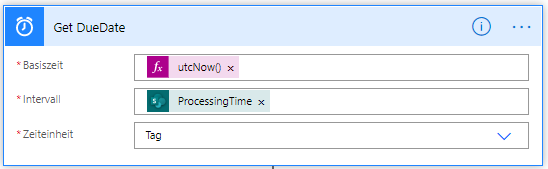
Then calculate the next creation date:
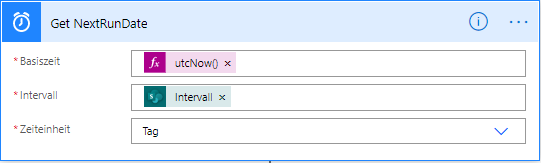
With all parameters ready, it’s time to create the task in Planner.
Create task and update definitions
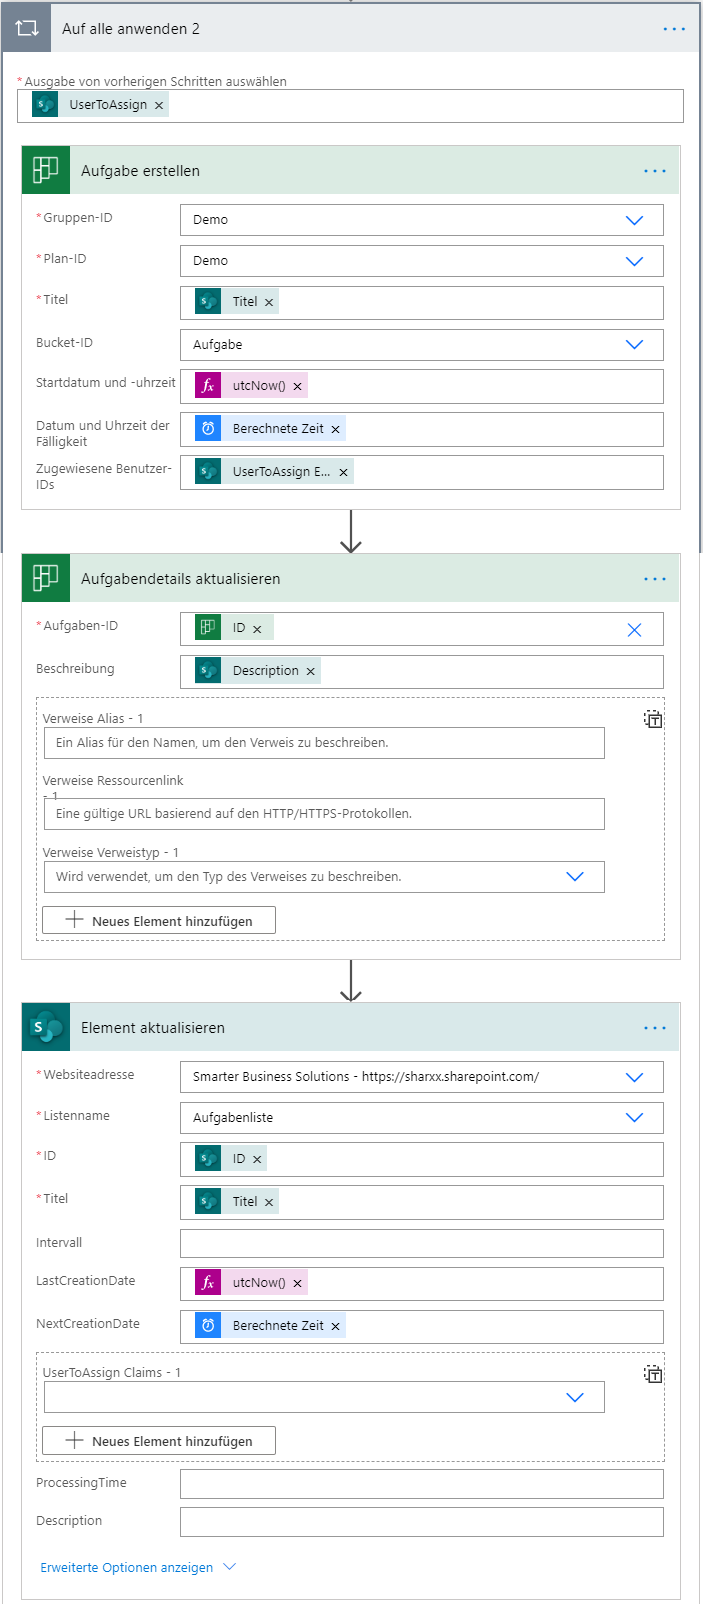
In the “Create a task” step, assign all required parameters.
Planner doesn’t let you add a description directly at creation time, so add another step, Update task, to include the task description.
Finally, use Update item to adjust the task definition so it’s ready for the next cycle.
That’s it—an easy way to implement recurring tasks in Microsoft Planner using SharePoint and Microsoft Power Automate.
If you have questions, feel free to get in touch via the button. For more helpful tips and guides, check out our blog.
- Microsoft Flow
- Microsoft Planner
- O365
- SharePoint