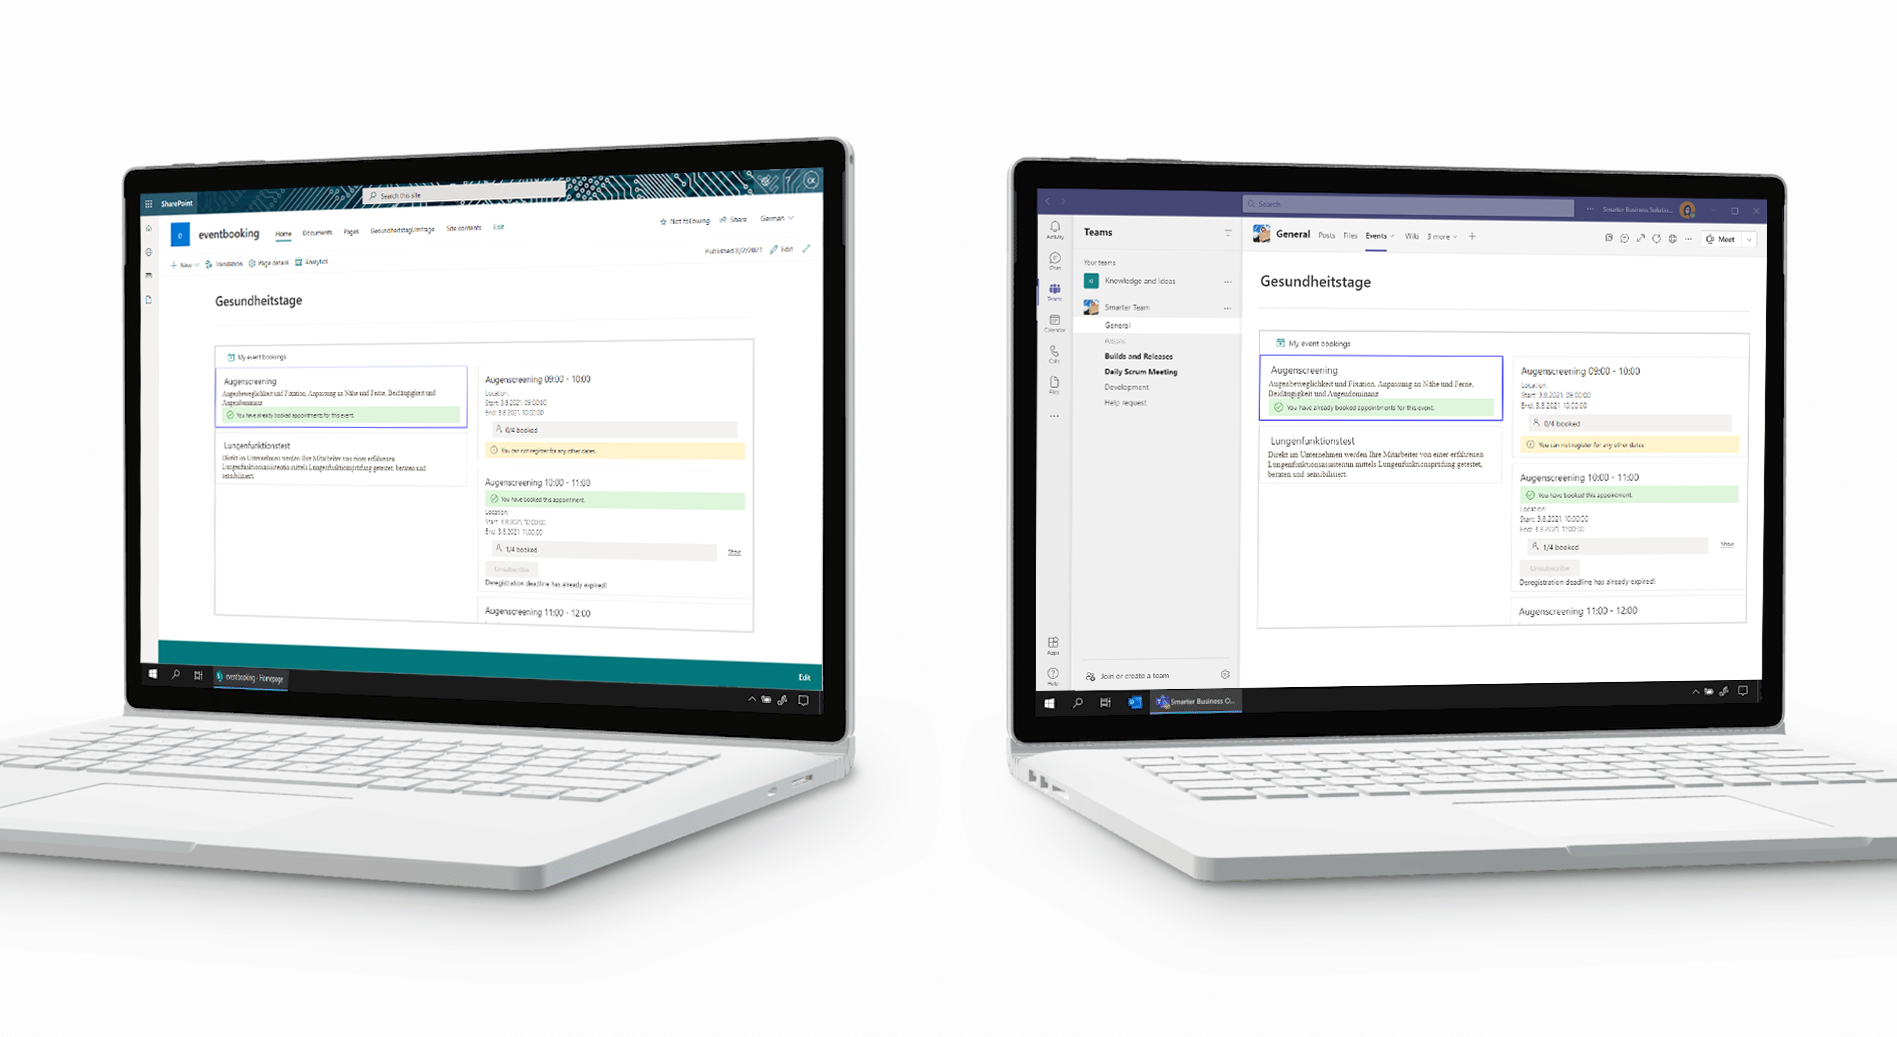
We recently introduced our new SPFx web part for event bookings. In this guide, you’ll learn how to enable event bookings in Microsoft Teams for your organization in just two steps. The Smarter Event Booking SPFx web part works in Microsoft Teams only if your organization uses Microsoft 365.
Step 1: Add the event booking web part to SharePoint
To make event bookings available in Microsoft Teams, a site admin first needs to add the Smarter Event Booking SPFx web part to a SharePoint page.
- If you obtained Smarter Event Booking from Microsoft AppSource, the installation package is automatically placed in your site’s app catalog. You can skip the next step.
- If you have the Smarter Event Booking installation package, go to your site’s app catalog. If you don’t have one yet, see Microsoft’s documentation on creating an app catalog. Upload the package there.
- Add the app to the desired SharePoint site via Add an app.
- Open an existing modern SharePoint ASPX page or create a new one and add our SPFx web part to it.
Step 2: Add the web part to Teams
To surface your event bookings in Microsoft Teams:
- In Teams, add a new tab in any channel for event bookings.
- Select SharePoint Pages to create a SharePoint page tab.
- Click Add a page from a SharePoint site.
- Enter the URL of the SharePoint page that contains the Smarter Event Booking SPFx web part and click Save.
That’s it. With the SPFx web part set up in SharePoint and Microsoft Teams, your Microsoft 365 users can plan events and register directly from Teams.