

After the gingerbread season in the supermarket has already started again, we thought it was time to take care of our Smarter Adventcalendar. 🙂 We have already introduced you to this in a previous blog post. In this blog post, we give you insights into the extensions for our Smarter Adventcalendar, so that we can soon offer it in the SharePoint Store.
Automated creation of SharePoint lists
After installing the Adventcalendar Web Part from the SharePoint Store, we automatically create all required SharePoint lists as hidden lists when the Web Part is loaded for the first time. We add all the necessary fields to the lists. This saves the user the complete configuration of the SharePoint lists, which are required for our Web Part. Furthermore, we automatically add all fields of the SharePoint lists to the respective default view.
// Ensure the list
const adventcalenderContentsListResult = await sp.web.lists.ensure(this.adventcalendarContentsList, undefined, undefined, undefined, { Hidden: true });

// Add fields e.g. "Text"
try {
    await list.fields.getByInternalNameOrTitle("Text").get();
} catch {
    await list.fields.addMultilineText("Text", undefined, true, false, false, true, {
        Description: strings.ContentTextFieldDescription
    });
}

// Add fields to default view
let defaultView = list.defaultView;
let viewFields: any = await defaultView.fields.get();
for (const fieldTitle of fieldTitles) {
    if (!viewFields.Items || viewFields.Items.indexOf(fieldTitle) < 0) {
        await defaultView.fields.add(fieldTitle);
    }
}
In the SharePoint list AdventcalendarContent we also add all 24 entries for each door of the adventcalendar. As a result, the administrator only has to enter the contents for the doors.
// Add all 24 adventcalendar door items
for (let i = 1; i < 25; i++) {
    try {
        await list.items.getById(i).get();
    }
    catch (error) {
        await list.items.add({ Title: i.toString() });
    }
}
Edit
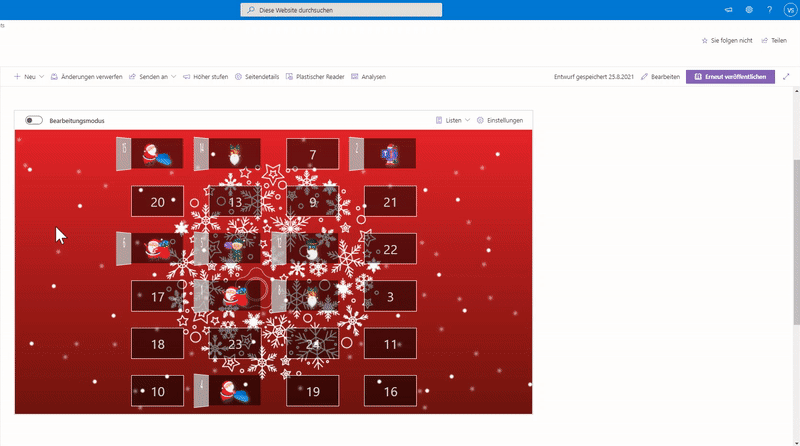
A completely new feature for our advent calendar is the edit mode. This is available for admins and can be activated via a toggle in the menu bar. If an admin activates the editing mode, he can enter the contents for the 24 doors. If he clicks on a door, we open the edit form for the selected door in a panel. The admin can enter and save the desired content.
Use your own background image
Another new feature is the configuration of your own background image. This function is again available for admins in the menu bar via the settings. If the admin clicks on the settings button, we open a panel where he can upload a custom background image. If he saves the selected image, it is automatically used as a background image for the adventcalendar.

Have we sparked your interest and would you like more information about our Smarter Advent Calendar? Then please get in touch with us.