In an earlier post, I wrote about why wasting time is the worst offense. At the end of a day or project, it’s useful to know how much time a Microsoft Planner task actually took.
At Smarter Business Solutions, we regularly challenge ourselves to change how we work. Every few months we adjust our processes so we’re using various Microsoft 365 technologies in real life, every day. That keeps us sharp and helps us advise our customers better. Some time ago, we moved our internal project management from SharePoint tasks and our own Kanban board to Microsoft Planner. Two key capabilities were missing for us:
- Time tracking
- Reporting
How can I track time on a Microsoft Planner task?
On the one hand, each of us wants to see where our time goes. On the other, our customers understandably want transparency on what’s being done in service projects. For us, time tracking isn’t a control tool; it helps us continuously improve our processes. And, most importantly, it has to be fast, intuitive, and happen on the side while you work.
But how? Out of the box, Microsoft Planner doesn’t let you record time. And unlike SharePoint or Teams, you can’t build custom apps inside Planner. So we built a small but effective Power App for our own use.
Architecture of our time-tracking Power App
Using the Microsoft Planner connector in Power Apps, we connect to Planner and display the following, linked data tables:
- Plans
- Buckets of a selected plan
- Tasks in a selected bucket
- Checklist items of a selected task
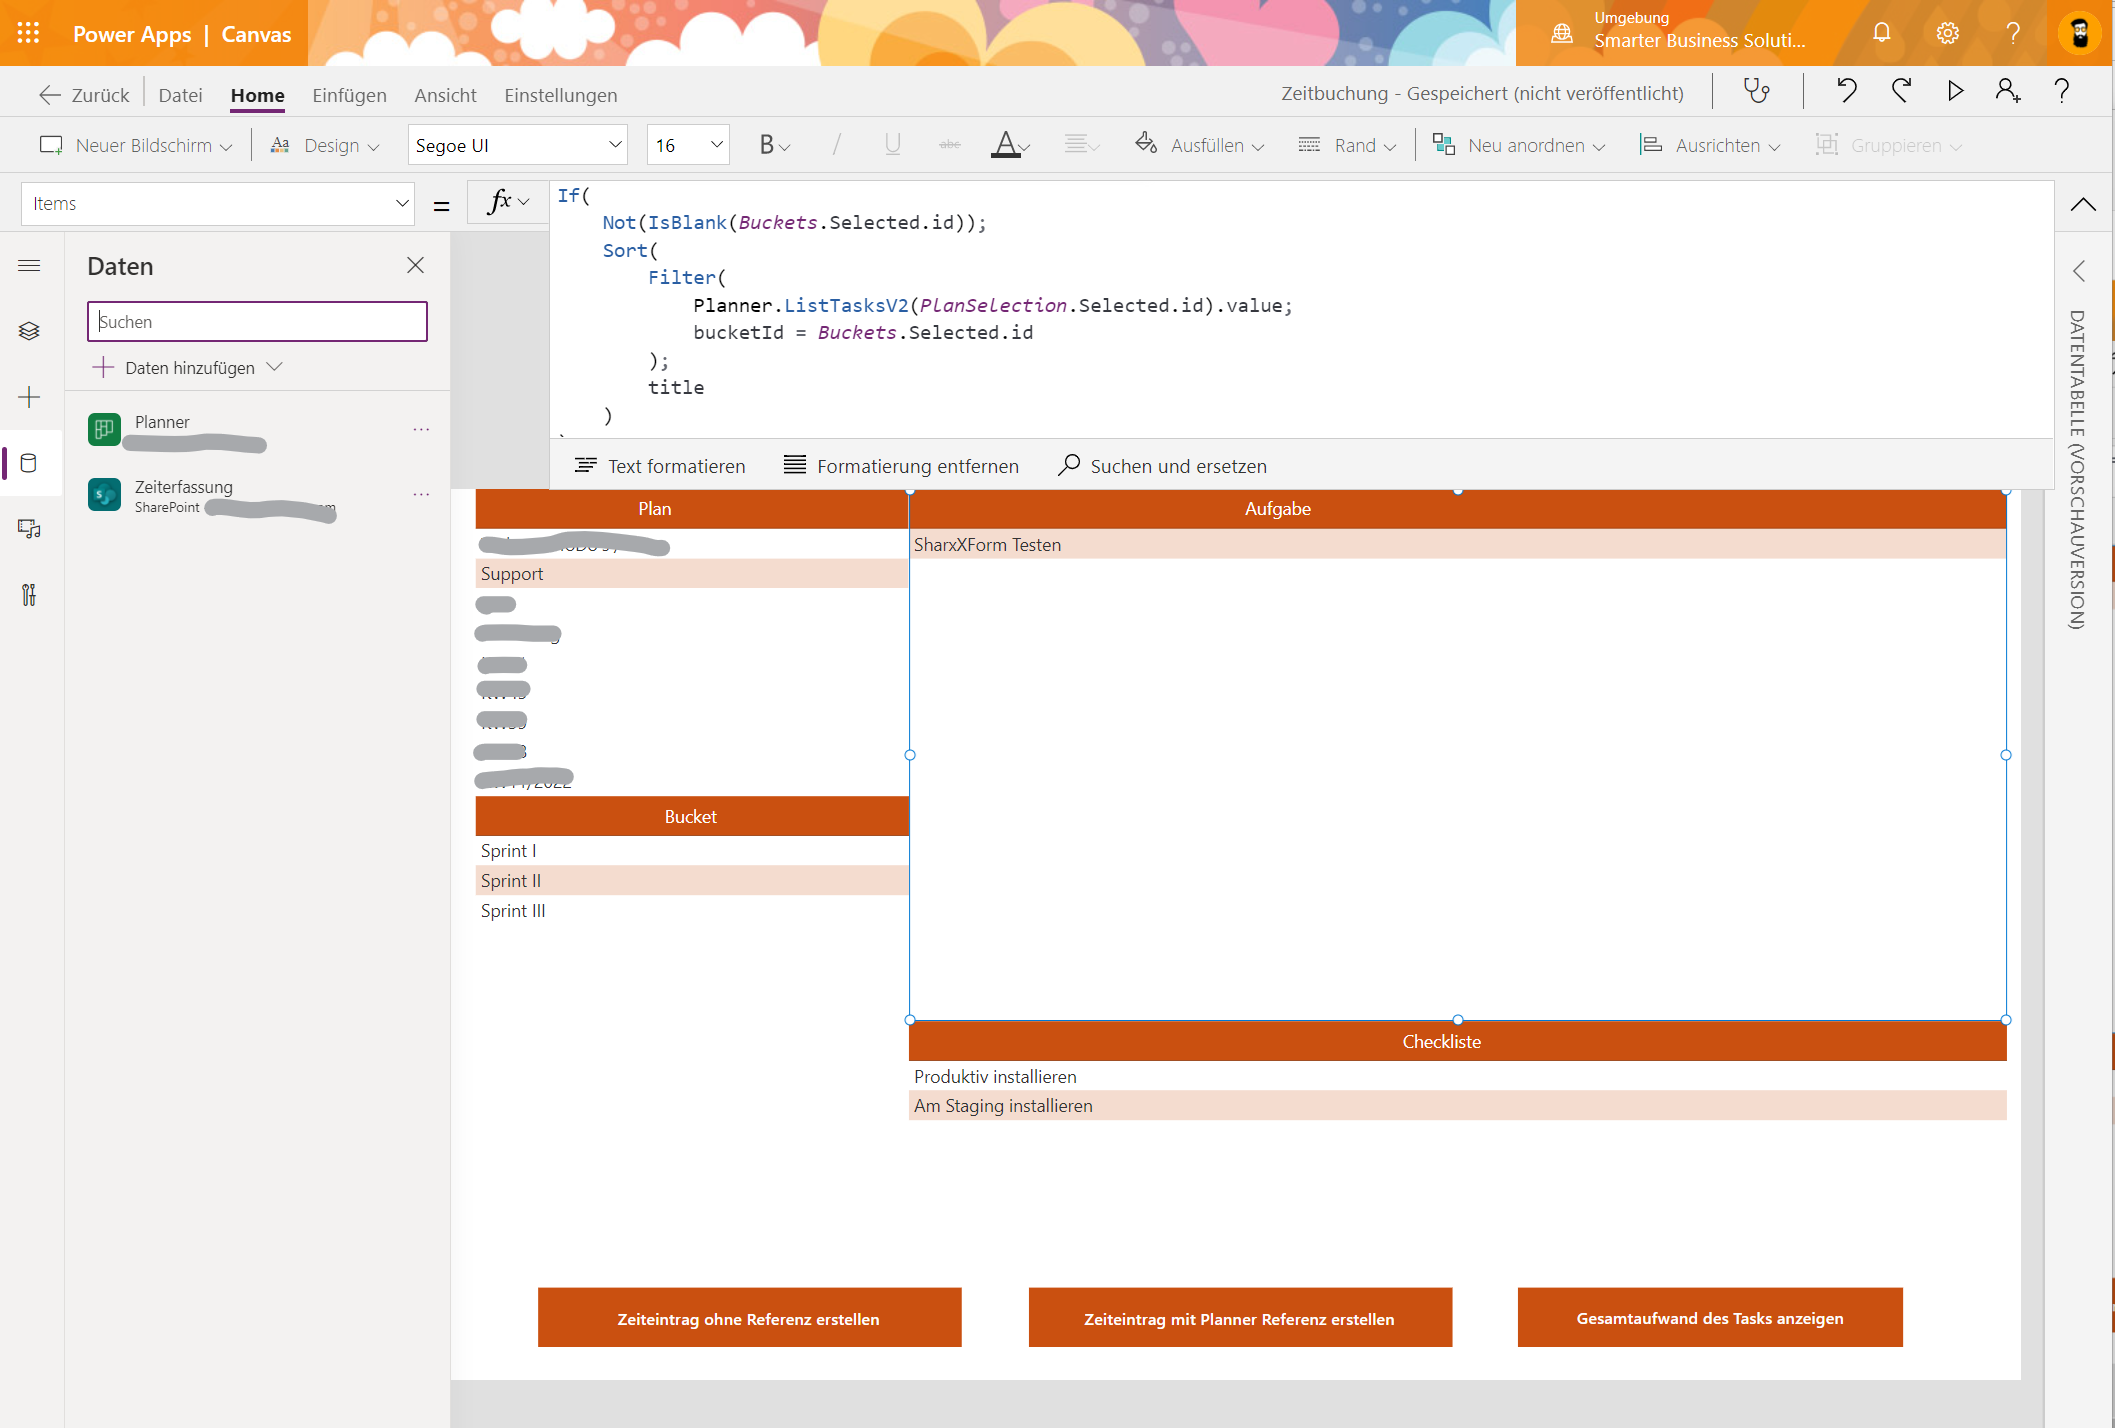
Clicking Create time entry with Planner reference opens a form. We automatically prefill all relevant Microsoft Planner fields. When you save, the entry is stored in a SharePoint list named Time tracking with all relevant information. The best part: most of the time we only enter the number of hours. All other data comes from the selected plan, bucket, task, and checklist.
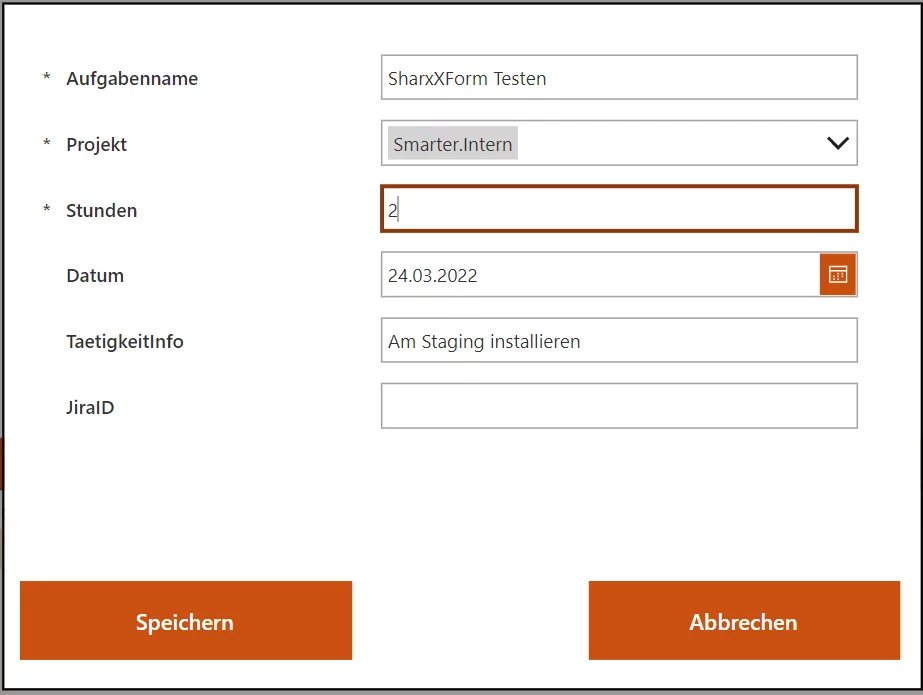
Each colleague books their time to a plan, bucket, task, or checklist item. We even auto-link to a customer’s JIRA when a JIRA ID appears in the task or checklist title. (Yes, some customers still use JIRA!)
Every company handles time tracking a bit differently, so our approach and this Power App are intended as an example. The important thing is to define upfront which data should be stored, how, and where—so you can report on it later. In a future blog post, we’ll cover reporting for Microsoft Planner.