

Here you will find our User Manual for our Outlook Add-in O2S. You may also download our User Manual as a pdf. If you have any questions please contact our support.
1.1 System requirements
O2S is compatible with:
- Microsoft Windows Vista/7/8/8.1/10
- Microsoft Server 2008/2013/2016
- Microsoft Office 2010/2013/2016
- SharePoint
- SharePoint 2010, 2013, 2016, Office 365
- all Authentication-Types (Windows, Forms, Ntml, Kerberos, Claims-Federated…)
- Internet Explorer 8 and later versions
Important: In addition to the product, the .NET Framework 4.0 is also required (the full version, not the client profile). If you do not have the .NET Framework 4.0 installed on your computer, a download link for automatic installation will automatically be provided.
1.2 Installation options
There are basically two different ways to install O2S. Both require administration permissions!
- Installation via setup.exe
- Installation via setup_package.msi
The simpler installation option is the installation process via setup.exe, which is described below. If you want to install O2S via setup_package.msi, you will find a detailed description of the installation process in the back of the user manual.
1.3 Installation process via Setup.exe
First: If you install O2S, it will be installed on the system for all users. The respective registry entries can be found under HKEY_LOCAL_MACHINE.
For the installation process it is recommended to stop all running Microsoft Office products.
To start the installation of the “O2S”, please double-click on “setup”:

Then confirm the start of the installation process with “Yes”. This will open the O2S Installation Setup Wizard:
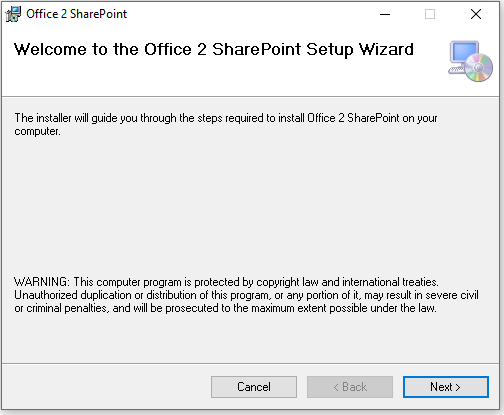
Select “Next” to install O2S on your machine and follow the history. To complete the installation successfully, close the installation window by clicking on “Close”.
Before use, the SharePoint Explorer may need to be activated for each user individually.
- Please open Microsoft Outlook.
- In the Start ribbon of Outlook you will find the newly added O2S buttons on the far right. After clicking on “Navigation” the O2S App will open on the right side of the screen.·
- Enter the activation code in the field provided and click on “Activate”:
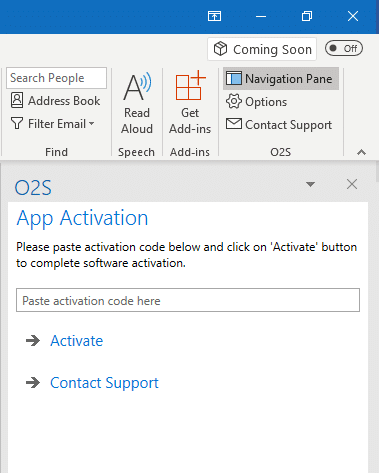
By entering a valid activation code, the license is verified for use, allowing O2S to be used.
If you have previously worked with an earlier version of O2S, your settings, links and groups will be transferred to O2S Navigation.
If you are installing O2S for the first time, SharePoint shortcuts or navigation groups must first be created. For more information, see Chapter 4 of this User’s Guide.
3.1 Showing and hiding O2S in Outlook
O2S can be hidden in the top right-hand corner of the Outlook Start ribbon by clicking on “Navigation” and hiding it again by clicking it again:

Furthermore, the following elements are displayed:
- Options: The settings for O2S (see chapter 8).
- Support request: Opens a new e-mail in Outlook that is present to our Smarter Business Support.

3.2 O2S add-in window
At the top level of O2S the following elements are visible:
- If you have previously installed an older version of O2S, you will find all installed groups and links here.
- “+ New”: Here you can create new groups or create new SharePoint links (see: Adding groups and SharePoint pages).
- The small triangle in the top right-hand corner of your O2S opens a menu where you can move your O2S individually, resize it and hide it with Close.
- You can also close the application by clicking on X in the upper right corner.
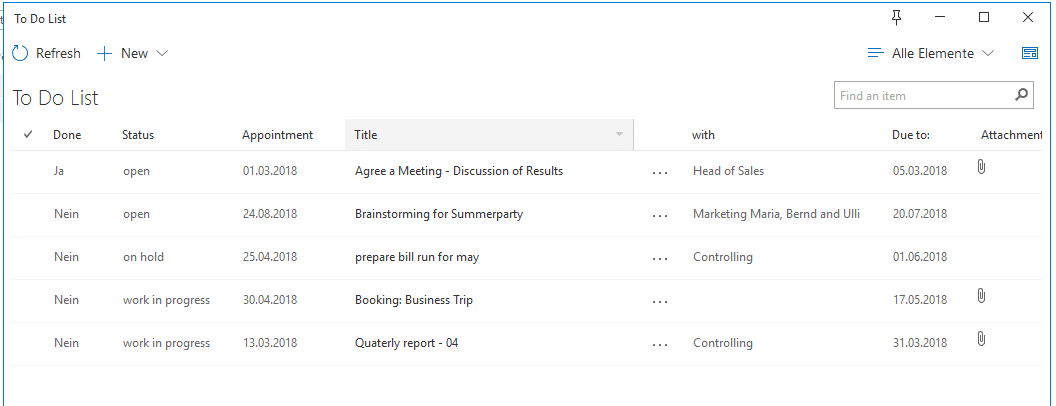
3.3 O2S workspace window
When working with O2S, a custom workspace window appears for editing in the center of Microsoft Outlook, which automatically resizes and collapses if it is not used:

Depending on the SharePoint element, here e.g. in a document library, documents can be uploaded / edited / deleted, or folders are created. This window can be pinned by clicking on the pin icon in the menu bar in the top right corner of Outlook to simplify working in parallel with the SharePoint window and Outlook. By clicking again on the pin symbol, the window can be released again.
If the pin is horizontal, the window is not pinned, and the window automatically collapses as soon as you start an action in Outlook. If the pin is displayed vertically (as in the screenshot above), then the window is pinned, and you can easily upload an e-mail in Outlook via drag & drop without automatically minimizing the window.
For more information about working with libraries and lists with O2S, see chapters 6 and 7 of this user manual.
3.4 Context menu and Ellipsis menu (…)
Basically, you will find all editing options in the context menu (opens by right-clicking) or in the ellipsis menu in the menu bar of O2S. As soon as you have selected an item in the navigation, the ellipsis button to the right of the menu item “+ New” appear:

4.1 Adding SharePoint pages
If you are in O2S, you have basically two different ways to connect to your SharePoint pages:
a) Link to SharePoint: Click “+New” and “Link to SharePoint”. Enter the URL of your SharePoint and click on “Next”:

b.) You may also enter the link via drag and drop to the navigation. Just drag the URL of your browser window to the O2S navigation:

Optionally, you can…:
- …rename the automatically determined name of your SharePoint page with your own name by entering the desired name in the “Title” field.
- … store the SharePoint page either in the general navigation (as shown here) or under your desired navigation group (see chapter 4.3). To do this, open the drop-down menu in the “Where:” box by clicking on the arrow symbol and select the desired storage location.
Complete the action with “Save”.
Upon successful addition, the corresponding SharePoint page will be displayed in the navigation. Clicking on the small triangle to the left of the name will load the underlying structure tree of your SharePoint.
4.2 Adding individual navigation groups
Groups allow you to structure your SharePoint elements individually according to your needs. If you want to quickly access frequently used items (such as the to-do list and document library of 2 current projects) you can create a group in the navigation (or group together important Office365 items in an Office365 navigation group).
Thus, you can directly open various elements of your SharePoint pages which you use often without always looking for them in the different pages and subfolders, etc. For items in a navigation group only the current list / folder is displayed, not any sub-items (such as folders).
How to add a new group to your navigation:
- You can create a new group by clicking on “+ New” in the O2S navigation and selecting “Navigation group”.
- Enter a name and click “Save”.
After successful creation the newly created group will be displayed in the navigation:

Optionally, you can use this action to create a subgroup in a group. Open the drop-down menu with the arrow symbol in the field “Where:” (shown in grey above) and select the corresponding group.
4.3 Adding SharePoint elements in a group
For example, you can use the Grouping feature to group your frequently used SharePoint pages. The elements in the group can also consist of internal and external SharePoint URLs:

How to add an element to a group:
- Select the desired item by right-clicking and then clicking “Save as …”.
- Optionally, you can change the name by entering the desired name in the “Title”
- Open the drop-down menu of the field “Where” by clicking on the arrows symbol and select the desired group.
- Click on “Save” to complete the action.
After successful addition, the element in the navigation is displayed in the corresponding group:

4.4 Manual update of the navigation
Loading or updating the SharePoint navigation takes place automatically when unfolding. If the navigation on the SharePoint has changed while the O2S navigation is open, you can also update it manually.
How to manually load your navigation:
- Right-click on the corresponding SharePoint page to open the context menu and then click on “Reload”.
- After a short moment, O2S reloads the selected SharePoint page and now displays the changed or newly added elements in the navigation:

Please note that only those SharePoint pages will be reloaded which you have selected by clicking on them. The other SharePoint sites (such as “Team SharePoint” as shown above) are not considered by the loading process.
4.5 Removing SharePoint pages
No longer needed SharePoint pages or navigation groups can be removed from the O2S navigation to keep them efficient, clear and tidy.
How to remove SharePoint pages from your navigation:
- Right-click on the SharePoint page you want to remove to open the context menu.
- After clicking on „Remove” the SharePoint page is removed from the navigation:

Removing groups or elements of a group
When removing custom navigation groups, you can use the procedure described above to either remove the entire navigation group or just delete individual elements from it:

Please note that when removing SharePoint pages, the underlying elements (subpages, lists, libraries, etc.) are always removed from the O2S navigation as well. If you cannot select the “Remove” option, this is because you are navigating within the lists in the structure tree of your SharePoint. For this reason, the “Remove” option is not available for selection in the context menu.
4.7 Opening SharePoint pages
SharePoint pages or links in the navigation are opened by clicking in the browser. The integrated workspace window cannot display SharePoint pages and is only used for user interaction with elements (lists / items) on the SharePoint page.
To see which SharePoint elements are automatically opened by clicking on them in the Workspace window and which are automatically opened in the browser, you can determine as follows:
When you hover over an item in your navigation, you’ll see an indication that this item can be opened either in the browser or in the Workspace window (“Open”):

Clicking on the respective element then opens it either in the browser or in the workspace window.
You can also open elements that can be opened as workspace windows directly in the browser. This feature gives you direct access to a specific SharePoint site without having to go to your SharePoint and then navigate to the page in SharePoint.
By right-clicking on the desired element, you open the context menu where you select the option “Open in browser”:

4.8 Moving SharePoint pages
You can move SharePoint pages in your navigation to any group or move a SharePoint page from a group to the general navigation. How to move SharePoint pages in the O2S navigation:
- Right-click on the SharePoint page you want to move to open the context menu and click on “Move to …”.
- Then select the desired storage location from the drop-down menu in the “Where:” field.
- Click on “Move” to complete the action. After successfully moving the link in the navigation view is displayed accordingly:

Please note that by moving SharePoint pages, the underlying elements (sub-pages, lists, libraries, etc.) are also moved from the O2S navigation.
If you only want to display individual elements in a group or in the general navigation, please use the function “Save as …” (see chapter 4.9).
4.9 Saving individual elements in the navigation or in a grop
For example, if you frequently use individual SharePoint libraries or SharePoint lists, you can save them directly in the navigation or in a group to make working easier, faster and more convenient. How to save your elements directly in the navigation or in a group:
- Right-click on the element to be saved to open the context menu and click on “Save as …”.
- Optionally, you can change the name in the “Title” field as required.
- Then select the desired storage location in the drop-down menu of the “Where:” field.
- Complete the action by clicking on “Save”.
After successful saving, the link in the navigation view is displayed accordingly:

4.10 Sorting the navigation and SharePoint elements in a group
You can move the navigation, items within a group and links up or down as you like.
- Right-click to open the context menu for the respective element and click on the desired action.
The item will be moved up or down one position after the action in the navigation:


If you cannot select the Up and Down options, then it’s because you’re navigating the tree of your SharePoint. For this reason, these options are not available for selection in the context menu.
4.11 Renaming groups and elements
You can rename groups, elements or links as you like.
- Right-click on the element to be renamed to open the context menu and click on “Properties”.
- Here you can enter any name in the “Title” field.
- “Save” saves your changes.
After successful renaming, the element will now be displayed under new names in your navigation:

Please note that SharePoint links that appear in the O2S navigation can be renamed, but not the underlying elements. That’s because you navigate in the tree of your SharePoint.
5.1 Layout und handling
By clicking on the desired list in the navigation, the workspace window opens within Microsoft Outlook:

As already described in chapter 3.3, you can pin the window by clicking on the pin symbol and release it again by clicking it again. Closing the window saves the last setting.
In addition to the existing functions in SharePoint, you have even more options that make it easier for you to work with a list in the workspace window. The workspace window includes the following functions for lists:
- Reload will reload changed items on SharePoint in your workspace window.
- With “+ New” you can add new items to the list or create new folders.
- You can also add new elements using drag & drop.
- You can filter and sort the list.
- You can apply the list views created in SharePoint.
- You can display properties of items in the Workspace window by clicking the “Form” icon in the upper right corner.
- You can search the list using the search function.
For example, you can use the “+ New” feature to create a new folder or document directly on SharePoint. The content types are available (e.g.: docx, xlsx, ppt etc.), which are stored in this list / library on your SharePoint.
5.2 Opening and downloading documents and folders
In general, documents in the workspace window can be opened or downloaded with a simple mouse click. With a mouse click on folders in the workspace window they will be loaded and displayed in the workspace window.
5.4 Navigating in the workspace
Below the menu item “+ New” the current file path is always displayed. If you work in subfolders, you can navigate upwards in the file path by clicking on the respective folder title:

5.4 Changing the column width
The columns can be expanded or reduced individually in the workspace window.
How to change the column width:
- As soon as you place your mouse cursor over the desired column it will be displayed with a grey background and a vertical line will appear on the right side of the column.
- Click and hold it as you drag the column to the desired width.
- End the action by releasing the mouse button.
5.5 Using the search function
With the help of the search function you can find documents quickly and easily. The search field in the O2S workspace uses full-text search, i.e. the content of the uploaded documents will also be searched for your search term.
Depending on which “navigation level” you are in the tree, all subfolders will also be searched. All folders and contents that are hierarchically above your page in the tree are not searched.
- Find the search box in the upper-right corner of the Workspace window with the grey label “Find an item”.
- Click in the field and enter one or more search terms. The more specific these terms are, the better your search results. For multiple search terms, please separate them with a space.

- Optionally, you can use the filter and sort functions to refine your search results and reduce the result list even further. Further information on filtering and sorting can be found in Chapters Error! Reference source not found. and Error! Reference source not found.
- To return to the original view, click on the X in the search field. This deletes the search term as well as the search result.
Please note that a document must first be deposited in the search index of your SharePoint before you can find it again through the search. If you have just uploaded a document and cannot find it with the search function, this is because it has not yet been saved in the SharePoint search index. The length of time that the SharePoint search index is refreshed may vary, depending on the configuration of the SharePoint farm.
5.6 Working with multiple workspace windows
If you need multiple lists or libraries at the same time for a single operation, you can easily do this with the handy “Open in New Window” feature:
- You have already opened a SharePoint page in the workspace window.•
- Right-click on the newly opened SharePoint page to open the context menu and click on “Open in new window”.

You can also reopen an already opened SharePoint page and display different views, sorts or filters from the same list or library:

If you want to create a new document or folder, you can create it in the workspace window as follows:
- In the workspace window, click on “+ New” and select the desired file type.
- Enter a name and then click “Save”.
- If added successfully, the document or folder in the list has now been created.
- If you have created a new document, it opens in the standard program.

As mentioned earlier, when you create new items, you have the SharePoint content types (name and description being provided by your SharePoint). This feature includes the content types of folders, documents and list items.
If you want to upload existing documents or even folders or whole folder structures, you can do this easily by using drag & drop. Further information on this process can be found in chapter 6.4.
6.2 Creating new list entries via drag & drop
With O2S you can also create a new list entry using drag & drop quickly, easily and conveniently by uploading a document or an e-mail. With this function you can also save documents, e-mails etc. to an existing list entry.
- Select the item you want to upload.
- Hold down the mouse button and drag it into the open Workspace window, then release the mouse button.
- After a short moment, the elements are uploaded to the list and the editing window opens, where you can now make changes and click “Save” to complete the action.

6.3 Uploading documents to a list entry
You can also add documents to already existing list entries in this way. If you only want to upload an e-mail attachment and not the entire e-mail, you can also do this via drag & drop:
- Select the document(s) you would like to upload.
- Hold down the mouse button and drag it into the workspace window to the respective list entry, then release the mouse button.
- After a short moment, the elements will be uploaded to the entry and the editing window will open, where you can now make changes and complete the action with “Save”.

If you no longer need uploaded documents in an entry, you can always delete uploaded documents in the editing window. Simply click on “Delete” to the left of the corresponding document.
6.4 Uploading multiple documents
With O2S, you can quickly, easily and conveniently store locally stored documents on your SharePoint using drag & drop.
- Select the items you want to upload.
- Hold down the mouse button and drag them into the workspace window, then release the mouse button.
- After a short load, the items are uploaded to the list.·
You now have two options to choose from:
- Click on “Close” to finish the upload and close the dialog box.
- If you want to edit the metadata for the uploaded documents, please click on “Edit properties”.

- Click on “Edit properties” to open the editing window to enter the required metadata for the document.
- In the editing window, the setting “Set attributes for each file manually” above the ribbon is selected by default.
- By clicking on the grey button, you can make two additional settings here:

- “Suggest the same attributes for the following file”:
The metadata from the current edit form will automatically be applied to the next element to be edited.
I.e. by clicking on “Save” the displayed element is saved with the data. At the same time, the next element is loaded into the edit form. The fields with the metadata are automatically filled. This feature allows you to easily and efficiently edit documents with approximately the same metadata.
- “Use the same attributes for all remaining files”:
The same metadata will be used for all uploaded documents. With this function, you enter the required metadata once and O2S automatically handles these entries for all elements. With this feature, you can upload even large amounts of data in no time.
This will also allow you to put entire folders or folder structures in your selected SharePoint library.
After successful upload, you can edit the elements in the Workspace window at any time if required (see chapter 6.7).
6.4.1 Upload – filename is too long
Please note that a maximum of 256 characters is possible in the URL of Microsoft SharePoint. I.e. uploading folders or whole folder structures with very long file paths and / or file names, uploading is not completely possible due to this character limit. In this case, you receive the following message:
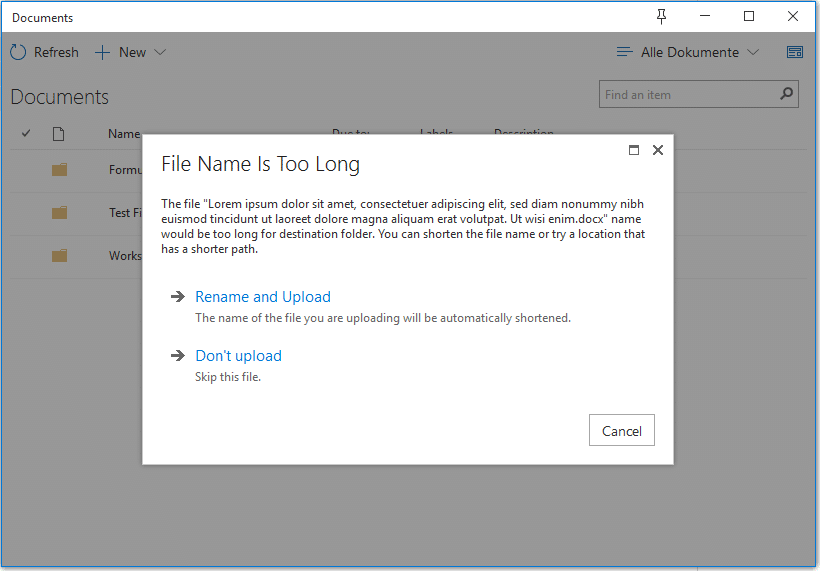
You can still upload the files by clicking on “Rename and Upload”.
Please note that with this option all characters after the 256 characters are automatically trimmed (this option can also be activated in general so as not to be asked for each time. For further information please refer to chapter Error! Reference source not found. or chapter 10 of this user manual.)
- “Do not upload” skips only the file displayed in the window and continues uploading with the other files you also want to upload.
- With “Cancel” you can cancel the entire upload. In this case, no files are uploaded.
Please note that when uploading documents or e-mails when saving to SharePoint forbidden special characters (for example: \, /,:, *,?,%, ~, & etc.) are automatically removed!
For more information about forbidden special characters, see: https://support.microsoft.com/en-gb/help/2933738/restrictions-and-limitations-when-you-sync-sharepoint-libraries-to-you
6.4.2 Upload – file already exists
If a file already exists in the destination directory, this is detected when uploading by O2S and you receive the following message:

- Click on “Upload and Replace” to replace this existing file with the currently uploaded file. You can generally activate this option so that you will not be asked for it every time. Further information can be found in chapter Error! Reference source not found. or chapter 10 of this user manual.
- Clicking on “Do not upload” leaves the files in the target directory and the current file is not uploaded.
- By clicking on “Upload, but keep all files” all files are uploaded and a sequential number is added to the file name.
- By clicking on “Let me decide for each file” you can choose in the subsequent window for each file, whether you want to Upload and Replace File / Not Upload / Upload Keep All Files.
- With “Cancel” you can cancel the entire upload. In this case, no files are uploaded.
6.5 Functions for list elements

The following functions are available in the context menu after selecting one or more elements:
Open:
Opens the selected document with the designated standard program.
View item:
The item is indicated by the DisplayForm.aspx of the list.
Edit item:
The element is indicated by the EditForm.aspx of the list.
Check out:
Check out the document from the library if you want to make separate changes.
Copy document:
Copies the element(s) to the clipboard.
Copy Hyperlink:
Copies the URL of the item(s) to the clipboard.
E-Mail a document:
Opens the window for sending an e-mail, the file is attached as an attachment.
E-Mail a Hyperlink:
Opens the window for sending an e-mail, the hyperlink(s) to the file(s) is / are inserted in the text field of the e-mail.
Download a Copy:
Opens a download dialog box for downloading documents.
Delete:
Deletes the selected items (Note: The items are deleted on their SharePoint, not just on the display of your workspace window).
Furthermore, if one or more elements are selected, the following options are offered in the menu:
Send Link:
Opens the window for sending an e-mail, the hyperlink(s) to the file(s) is / are inserted in the text field of the e-mail.
Copy Link:
Copies the URL of the item(s) to the clipboard.
Download:
(copy)Opens a download dialog box for downloading documents.
Ellipsis menu (…):
Provides you with the same functionalities as the context menu, depending on the directory type.
6.6 Additional features for list elements
O2S is customized for MS Office so that several other features are possible. You can e.g. insert images from a picture or document library directly into MS Word using “Copy file” or attach documents from SharePoint directly as attachments for new e-mails in MS Outlook.
- Select the desired file and right-click to open the context menu.
- “Copy file” saves it to the clipboard.
- Paste the file in any MS Office program either by right-clicking and “Paste” or by using the “Ctrl + V” key combination.

6.8 Views
O2S also applies your created views to lists or libraries and allows you to switch between your views. By default, your default SharePoint view is displayed.
How to switch to another view:
- Open the drop-down menu by clicking on the small arrow symbol (to the left of the „Form” icon).
- Click on the desired view.
- After a short loading time, the view is displayed in the workspace window.

Grouped views can also be displayed in the Workspace window of O2S:

6.9 Filtering lists
The filter property in O2S is a handy tool to efficiently restrict the display of elements. Not only can O2S filter by several different fields, but also by several different values within the fields.
How to filter your view by specific values:
- As soon as you place your mouse cursor over the column to be filtered, it will be highlighted in blue and a small grey triangle will appear.
- Click on the triangle to open the selection for this column.
- Check the box for the values you want to be displayed. These values are applied immediately, and unselected values are filtered out.
- Optionally, you can use the filter function in several columns to refine the result even more.

The columns which indicate a restricted selection by means of the filter function are marked with a filter symbol next to the name of the field.
To remove filters again, open the selection again and click on “Remove filter from this column”. This removes the entire selection and displays the unfiltered, complete list in the workspace window.
6.10 Sorting lists
The workspace window also offers the option of sorting the list entries in ascending or descending order according to a specific column.
- Select a column to be used as the sort criterion.
- As soon as you place your mouse cursor over the column to be sorted, it will be highlighted in blue and a small grey triangle will appear.
- Click on the triangle to open the selection for this column.
- Select ascending or descending sorting.
- Optionally, you can also use the filter function for other columns to refine the result even more.
In this example, the document type was sorted in ascending order:

Sorted views are indicated by the arrow symbol up (ascending) or down (descending) next to the column name.
7.1 Uploading e-mails
With O2S, you can drag and drop e-mails quickly, easily and conveniently to your SharePoint.
- Select the e-mail(s) you want to upload.
- Hold down the mouse button and drag it into the Workspace window, then release the mouse button.
- After a short loading time, the e-mail(s) will be uploaded.

- Optionally, the properties can still be edited. Click on “Edit properties” to open the editing window in which you can enter the metadata.
- “Save” will apply your entries.

7.2 E-Mail preview
In the mail library, you can also quickly preview your stored e-mails without having to download the complete mail file. The preview shows you thecontent of the e-mail, which may include text as well as image files or graphics. Furthermore, the e-mail header information (from, to, cc, subject etc.) will be included in the preview. If the e-mail contains attachments, you will also find this information in the e-mail header.
How to use the e-mail preview:
- Select the desired e-mail by clicking on it once
- Now click on the “letter” symbol in the right corner of the menu bar.
- A preview of the e-mail opens in the right half of the window.
- To close the preview, click the “letter” icon again.

Optionally, by clicking on the “zoom in” icon (arrows) in the right corner, you can see the preview in the full width of the window. If you click the arrow icon again, the display shrinks again.

If you are not offered a letter symbol in your library, it may be that this is not a mail library, or the library has not yet been extended to a mail library. Further information on how to extend your library to a mail library can be found in chapter 7.3.
7.3 Extending an e-mail library
In O2S, you can extend a library to a mail library. With this feature, metadata from the e-mail are automatically transferred to the respective fields and, if necessary, only need to be supplemented or not post-processed. So, by uploading the e-mail, you have completed the entire process.
To extend your library to a mail library:
- Select the library to be extended by right-clicking to open the context menu where you select “Properties”.
- If the element is a mail library, you now also have the button “Extend Mail Library” to choose from, which you can click on.
- Start the extension of the mail library by clicking on “Extend” in the next step.
- After loading for a short time, the message appears that your mail library has been extended.
- Click on “Close” to finish the process.

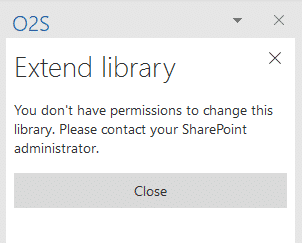
Libraries that have already been extended to a mail library can also be recognized by the changed navigation icon next to the library name. If you have not been able to complete the process above and receive the following message, please close the window and contact your SharePoint administrator:
Further settings for your O2S can be made via the O2S options:
- Click on “Options” in the “Start” ribbon of Outlook to open the settings window.

The settings are divided into two categories: On the one hand the general settings of O2S and on the other hand the app-specific O2S settings.
8.1 General Settings
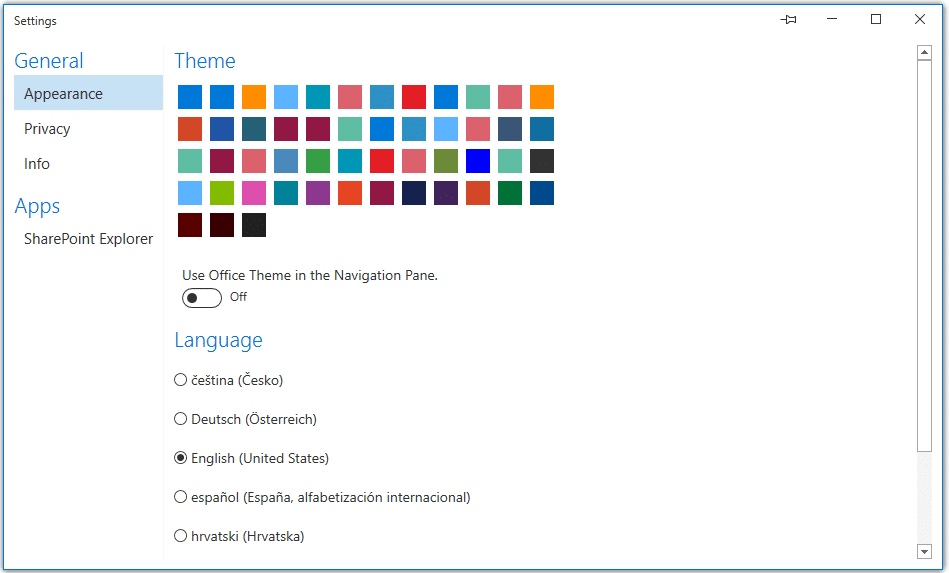
8.1.1 Customize
Here you find the language settings of O2S, as well as various colour schemes to personalize your O2S.
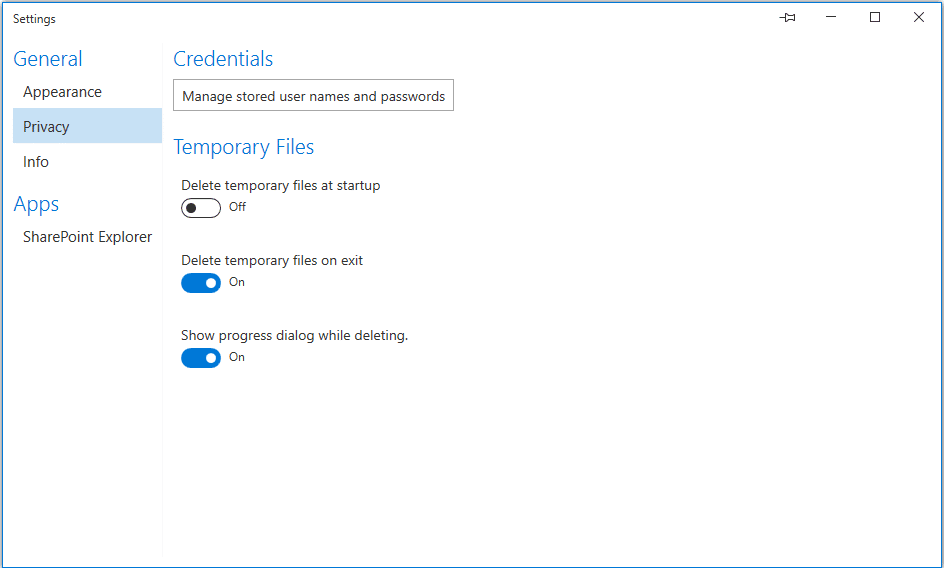
8.1.2 Privacy
O2S needs to cache files for uploading or downloading to a manually-definable folder. In this menu, you can personalize the setting when you want to delete your temporary, saved files to ensure more security of your privacy.
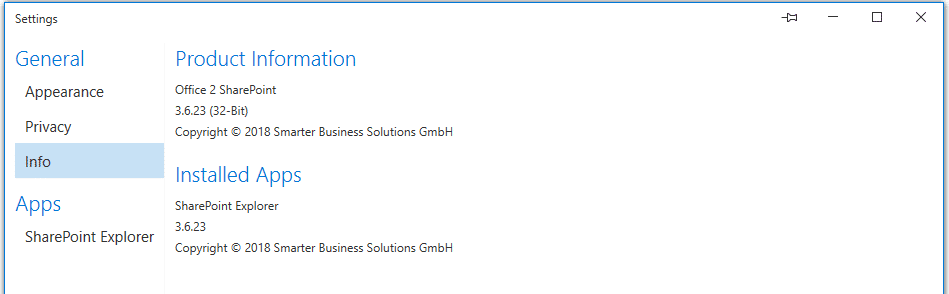
8.1.3 Information
Here you will receive general information about your O2S product as well as all other installed Smarter Business apps.
8.2 O2S – specific settings – SharePoint Explorer
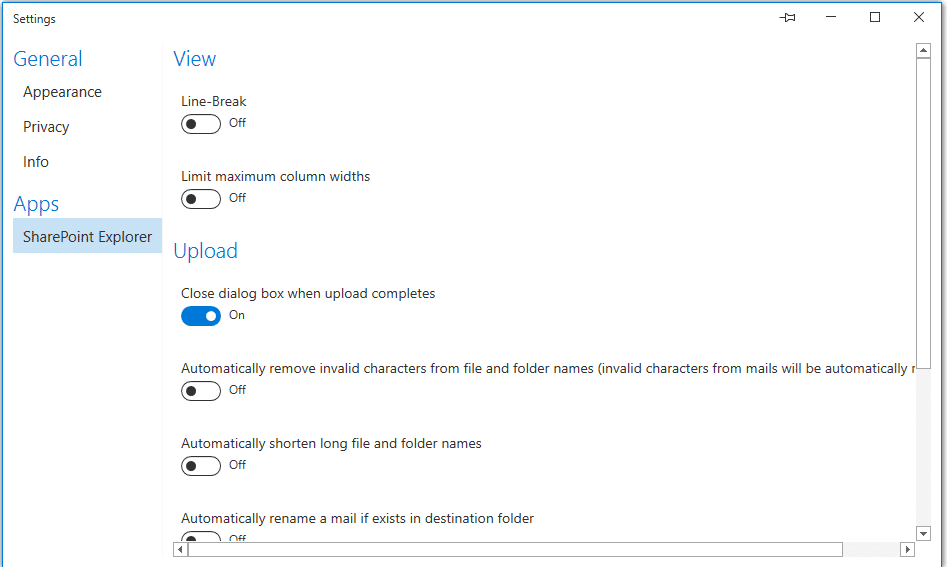
8.2.1 View
By activating the “line breaks” option, you can generally allow a line break in your views.Enabling the “Set maximum column width” option allows you to set a fixed width that you want for all the columns in your view.
8.2.2 Upload
Close dialog after successful upload
By default, you will receive a dialog box to confirm a successful upload, which you can use to show or hide with this feature.
Automatically trim long file and folder names
By default, if the file and folder names are too long, you will get a dialog box with various options to choose from (see also chapter 6.4.1 of this user manual). If you enable this feature, all file and folder names are automatically trimmed and uploaded without having to manually select an option.
Automatically change e-mail names if the same e-mail exists in the destination folder
If you activate this function, the e-mail will be appended with a consecutive number if it already exists in the desired destination folder.
Mark uploaded mails as read
If you enable this feature, uploaded e-mails will automatically be marked as read.
Categorize uploaded e-mails
If you activate this function, you can select a desired category. Uploaded e-mails will be automatically assigned to this category.

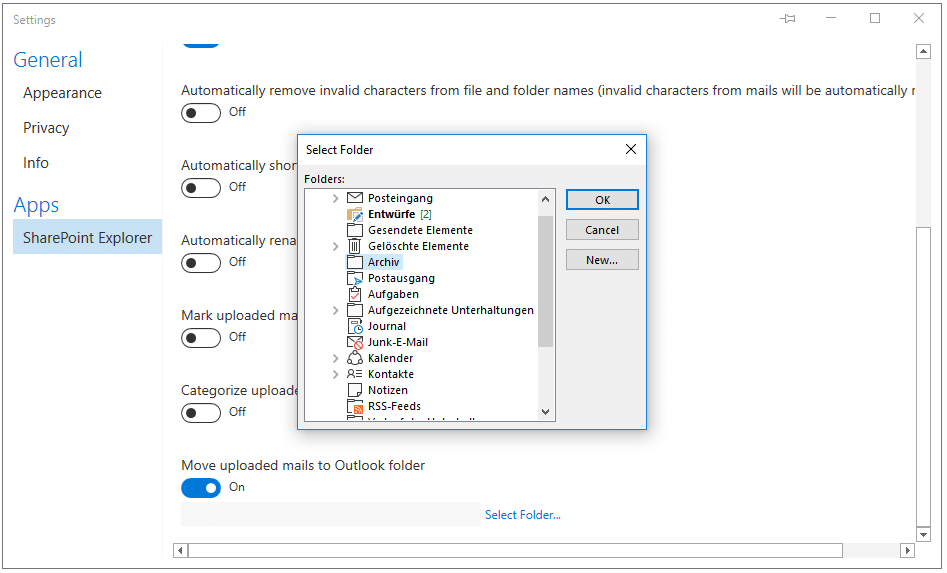
Move uploaded mails to Outlook folder
If you enable this feature, you can select a desired folder for storage. Uploaded e-mails will be automatically moved to this folder.
Clicking on “Support request” in the Start ribbon of Outlook opens a new e-mail to a stored e-mail address (by default the support address of Smarter Business Solutions GmbH: support@smarterbusiness.at).

10.1 Installation process via setup_package.msi
For a location-wide rollout via deployment software, the MSI of the installation package can be used. The following parameters are to be used here.
Only the progress dialog without user interaction:
msiexec.exe /i “<PFAD>\setup_package.msi” /qb
or without visual display:
msiexec.exe /i “<PFAD>\ setup_package.msi” /qn
10.2 User administration
The authentication of the users who work with O2S takes place via the Windows Credential Manager, i.e. via the Windows Security integrated in your operating system. Thus, if you decide to save the credentials when you connect to SharePoint to log in automatically the next time, you can find the information stored in your device’s Control Panel under “Control Panel \ User Accounts \ Login Information Management”:

Under “Generic credentials” you will find the user information that O2S uses for authentication to the system. The entries used by O2S are marked with the prefix “SBS.O2S:”. Changing the credentials or deleting credentials is also possible here.

10.3 SBS.O2S.SharePointExplorer.xml
10.3.1 Application settings
<app.service_id Value=”6C69345906820A556…” Overwrite=”True“/>
- Must not be changed manually!
<app.activation_code Value=”” Overwrite=”False“/>
- If the product code is set in „Value”, O2S will be activated automatically. An input of the O2S activation code by the user is no longer required (Silent Activation).
<app.use_browser_authentication_whenever_is_possible Value=”False” Overwrite=”True“/>
- Prefers browser authentication if supported by the server. (e.g. Office365) If not, the Windows Credential Cache is used.
<app.connection_limit Value=”32” Overwrite=”True“/>
- Internal Setting must not be changed. Number of connections O2S is allowed to open.
10.3.2 Navigation settings
<navigation.resolve_sharxx_navigation Value=”True” Overwrite=”True“/>
If Value is set to “True” the SharxXNavigation.xml is taken into account for the structure of the SharePoint pages. If you do not want to use the SharxXNavigation.xml for the structure you need to set the value to “False”. Further details can be found in chapter 10.3.3
<navigation.resolve_quicklaunch_navigation Value=”True” Overwrite=”True“/>
- If Value is set to “True” the SharePoint Quick Launch will be used for structuring the SharePoint pages. If you do not want to take the SharePoint Quick Launch into account for the structure, set the value to “False”. Further details can be found in chapter 3.3.
<navigation.resolve_lists_when_quicklaunch_is_empty_or_disabled Value=”True” Overwrite=”True“/>
- Loads all available lists of the web. (System and hidden lists are not loaded) If disabled only empty Web nodes are displayed. Further details can be found in chapter 3.3.
<navigation.resolve_subwebs_when_quicklaunch_is_empty_or_disabled Value=”True” Overwrite=”True“/>
- Loads available sub webs under the current web node.
<navigation.populate_sub_folders_on_demand Value=”False” Overwrite=”False“/>
- If “True” lists/subfolders will be loaded level by level when clicked on. Otherwise everything is loaded at the initialization of the list.
<navigation.show_progress_while_loading Value=”True” Overwrite=”True“/>
<navigation.show_progress_while_updating Value=”True” Overwrite=”True“/>
- Shows the green progress icon on web / list nodes etc. when being loaded / expanded.
<navigation.loading_progress_show_delay_time Value=”1” Overwrite=”True“/>
- Delayed time in seconds from when the progress icon is loaded when loading the navigation.
<navigation.updating_progress_show_delay_time Value=”3” Overwrite=”True“/>
- Delayed time in seconds from when the progress icon is showed when updating the navigation.
<navigation.core_request_limit Value=”6” Overwrite=”True“/>
- Internal setting must not be changed! Only serves individual performance tweaking in case of problems – max. async operations per CPU thread.
<navigation.min_request_limit Value=”12” Overwrite=”True“/>
<navigation.max_request_limit Value=”24” Overwrite=”True“/>
- Internal setting must not be changed! Only serves individual performance tweaking in case of problems – min/max overall aysnc operation of all CPU cores.
<navigation.exclusions Value=”” Overwrite=”True“/>
- Not showing list names additional to system lists
- E.g.: <!–<navigation.exclusions Overwrite=”True” Value=”/Site Pages / last used /Recent /Website Objects”/>–>
10.3.3 Structure of the navigation
When you add a SharePoint page to O2S, you can manually change the sub elements of the page or their layout. By default, the structure of the navigation is based on a hierarchical selection criterion:
- xml
- if deposited this .XML file will be used for the structure
- available through other Smarter Business products, such as the Excel2SharePoint app
- QuickLaunch of the SharePoint page
- if no SharxXNavigation.xml has been deposited
- QuickLaunch of the page can be set manually in the browser
- Show all page contents
- if no SharxXNavigation.xml has been deposited
- if no QuickLaunch has been set
10.3.4 List settings
<list.view.line_break Value=”False” Overwrite=”False“/>
- Shows multiline fields to clearly display more content in a single row
<list.view.override_maximum_column_widths Value=”False” Overwrite=”False“/>
- Activates the automatic adaption of the column width
<list.view.maximum_column_widths_limit Value=”550” Overwrite=”False“/>
- Automatic adaption of the column width in pixels
<list.search_item_limit Value=”100” Overwrite=”True“/>
- Internal setting for performance tweaking, must not be changed. Number of search results displayed at once
<list.override_default_group_item_limit Value=”True” Overwrite=”True“/>
- Internal setting. Activates the grouping limit of lists
<list.group_item_limit Value=”30000” Overwrite=”True“/>
- Internal setting. Since SharePoint displays the number of grouped elements in the web differently than O2S and activates paging when the amount of list elements defined in the view is exceeded, this limit is bypassed here because otherwise no correct representation can be made and elements may be omitted.
<list.forms.show_maximized Value=”False” Overwrite=”False“/>
- Display size (maximized Yes/No) of the Sharepoint Overlay Form within the list window.
10.3.5 Upload settings
<upload.close_dialog_box_when_upload_completes Value=”True” Overwrite=”False“/>
- If Value is set to “True” the option “Automatically close dialog after successful upload” is activated by default in O2S. Disable this feature by setting Value to “False”.
<upload.automatically_remove_invalid_characters_from_names Value=”False” Overwrite=”False“/>
- If Value is set to “True” all invalid characters are automatically removed when documents are uploaded. Disable this feature by setting Value to “False”.
<upload.automatically_shorten_long_names Value=”False” Overwrite=”False“/>
- Automatic trimming of too long filenames. If deactivated the user receives a message dialog for manual adjustments instead.
<upload.folder.default_name Value=”Untitled Folder” Overwrite=”True“/>
<upload.file.default_name Value=”Untitled File” Overwrite=”True“/>
<upload.mail.default_name Value=”Untitled Mail” Overwrite=”True“/>
- Name that is used. Should all characters of a file-/folder name on a SharePoint be invalid or the mail subject be empty.
<upload.mail.automatically_rename_if_exists Value=”False“/>
- If Value is set to “True” the option “Automatically rename a mail if it already exists in the storage location” is activated by default in O2S. Disable this feature by setting Value to “False”.
<upload.mail.permissions_url Value=”” Overwrite=”True“/>
- Value can optionally be set to a link to an XML file containing lists in which it is not possible to upload e-mails.
<upload.mail.filename_prefix Value=”” Overwrite=”True“/>
- If Value is set, the names of the uploaded e-mails are supplemented by a definable prefix (this value). Disable this feature by leaving Value empty.
<upload.mail.filename_suffix Value=”” Overwrite=”True“/>
- If Value is set, the names of the uploaded e-mails are supplemented by a definable suffix (this value). Disable this feature by leaving Value empty.
<upload.mail.action.mark_as_read Value=”False“/>
- If Value is set to “True” the option “Uploaded mails marked as read” is activated by default in O2S. Disable this feature by setting Value to “False”.
<upload.mail.action.categorize Value=”False“/>
- If Value is set to “True” the option “Provide uploaded mails with a category” is activated by default in O2S. Disable this feature by setting Value to “False”.
<upload.mail.action.categorize.categories Value=””/>
- If the option “Provide uploaded mails with a category” is enabled, you can set Value to be the standard category. Disable this feature by leaving Value empty.
<upload.mail.action.move Value=”False“/>
- If Value is set to “True” the option “Move uploaded mails to a folder” is activated by default in O2S. Disable this feature by setting Value to “False”.
<upload.mail.action.move.destination Value=””/>
- If the option “Move uploaded mails to a folder” is enabled, you can set Value to be the default folder. Disable this feature by leaving Value empty.
<upload.mail.save_properties_to_sharepoint Value=”True” Overwrite=”False“/>
- If the document library is a mail library, mailboxes are filled automatically.
10.4 EnvironmentVariables.xml
<?xml version=”1.0″ encoding=”UTF-8″?>
<EnvironmentVariables>
<ApplicationData Value=”%AppData%\Smarter Business Solutions\Office 2 SharePoint“/>
<Cache Value=”%AppData%\Smarter Business Solutions\Office 2 SharePoint\Cache“/>
<Configuration Value=”%AppData%\Smarter Business Solutions\Office 2 SharePoint\Configuration“/>
<Temp Value=”%AppData%\Smarter Business Solutions\Office 2 SharePoint\Temp“/>
<Logs Value=”%AppData%\Smarter Business Solutions\Office 2 SharePoint\Logs“/>
</EnvironmentVariables>
In this file the paths of the folders used for O2S are specified. An AppData directory, a cache directory, a configuration directory and a Temp directory can be entered manually. O2S requires all four folders while running.
10.5 SBS.O2S.Cleaner.xml
<clean_at_startup Value=”False“/>
- If Value is set to “True” the option “Remove temporary data at launch” is activated by default in O2S. Disable this feature by setting Value to “False”.
<clean_on_exit Value=”True“/>
- If Value is set to “True” the option “Remove temporary data at close” is activated by default in O2S. Disable this feature by setting Value to “False”.
<show_progress_dialog_while_cleaning Value=”True“/>
- If Value is set to “True” you can see a dialog with a progress bar when removing temporary data in O2S. Disable this feature by setting Value to “False”.
10.6 SBS.O2S.Infrastructure.xml
<Theme Value=”Fabric” Overwrite=”False“/>
- Additional colour scheme of the O2S fonts and icons. Here you can set the colour scheme of O2S in Value.
<taskpane.use_office_theme Value=”True” Overwrite=”False“/>
- Specifies whether the Outlook colour scheme should be used.
<localization.language Value=”de-AT“/>
- Here you can set the language of O2S in Value.
10.7 SBS.O2S.Outlook.xml
<settings.info.product_info.link_title Value=”” Overwrite=”True“/>
- Additional info line in the O2S settings dialog in Information
<settings.info.product_info.link_url Value=”” Overwrite=”True“/>
- Additional link line in the O2S settings dialog in Information
<diagnostics.enable_developer_mode Value=”False” Overwrite=”False“/>
- Internal setting must not be changed!
<support.e-mail_address Value=”support@sharxx.com“/>
- The e-mail address which is going to be contacted when clicking “Contact support” in O2S can be entered in Value (must not be changed).
10.8 SBS.O2S.SharePoint.xml
In this file settings for the consideration of the SSL certification or proxy configuration can be made.
<ssl.ignore_certificate_errors Value=”True“/>
<proxy.use_default_web_proxy Value=”True“/>
<proxy.use_system_proxy Value=”True“/>
<proxy.use_default_credentials Value=”True“/>
<proxy.use_default_network_credentials Value=”True“/>
- Optional, various proxy settings
<web.security.authentication.providers.adfs.realms Value=”” Overwrite=”True“/>
- Optional, several ADFS realms can be entered in Value, separated with “;”
E.g.: <web.security.authentication.providers.adfs.realms Overwrite=”True” Value=”urn:sharepoint:sharxx.com; urn:sp13test:sharxx.com; urn:auth0:sharxx; urn:silentfarm:sharxx.com”/>
<web.security.authentication.providers.adfs.servers Value=”” Overwrite=”True“/>
- Optional, several ADFS servers can be entered in Value, separated with “;”
E.g.: <web.security.authentication.providers.adfs.servers Overwrite=”True” Value=”https://dev.sharxx.at”/>
<web.utilities.mui.use_language_switcher Value=”True” Overwrite=”True“/>
- Activate multilingualism detection.
<web.utilities.use_splnu Value=”False” Overwrite=”True“/></configuration>
- Internal setting, must not be changed!
10.9 SBS.O2S.SharePointExplorer.E-mailFieldMappings.xml
Here you can make detailed settings for the e-mail mappings on corresponding fields of an O2S mail library.
The order in the XML also influences the order in which the mail fields are created in a document library.
Further details on this topic are stored in the XML itself.